Learn how to make onigiri at home with simple tips, classic fillings, and shaping methods for perfect Japanese rice balls every time.
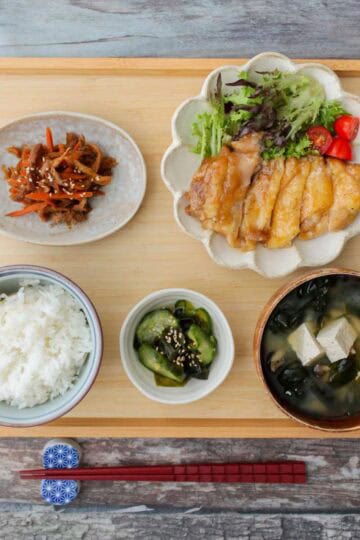
I grew up eating onigiri teishoku with my dad at a small countryside restaurant that served two onigiri, a bowl of miso soup, and a simple main like Japanese karaage or grilled fish.
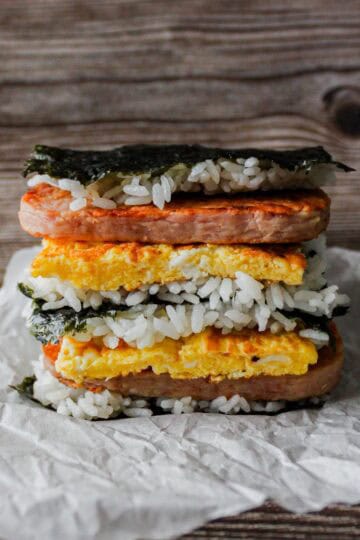
Onigiri might look humble, but it’s like a blank canvas where you can play with shapes, fillings, and even how you wrap the nori.
In this post, you’ll learn everything you need to know about onigiri (Japanese rice balls), from choosing the right rice to shaping and wrapping it perfectly. Once you master the basics, you’ll be able to make onigiri for bento, snacks, or quick meals anytime.
Jump to:
🎁FREE Onigiri eBook
📺Prefer to Watch?
🍙What is Onigiri (Omusubi)?
Onigiri, also called omusubi, are Japanese rice balls made with short-grain rice, often filled with tasty mix-ins and sometimes wrapped in nori seaweed.
Their history goes way back to the Yayoi period (300 BC – 300 AD), but by the Heian era (794 – 1185), onigiri had started to take the shapes we’re familiar with today. Back then, white rice was a luxury, so white onigiri were usually saved for Hare (celebration) days.
During the Sengoku era (mid-15th to early 17th century), onigiri became popular with everyone because they were so easy to carry and perfect little portable meals.
Nowadays, onigiri is loved as a quick snack, a bento staple, or a comforting homemade treat you can enjoy any time.
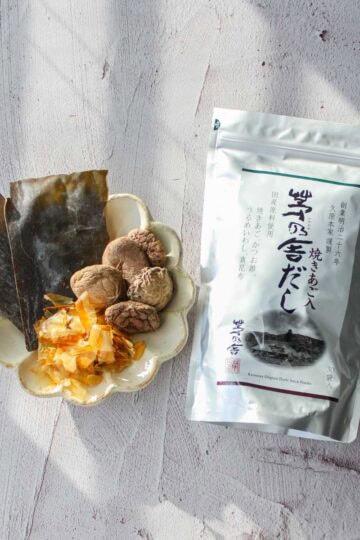
🛒Ingredients to Make Onigiri
There are many types of onigiri, but the basics are simple: rice, fillings or mix-ins, and nori.
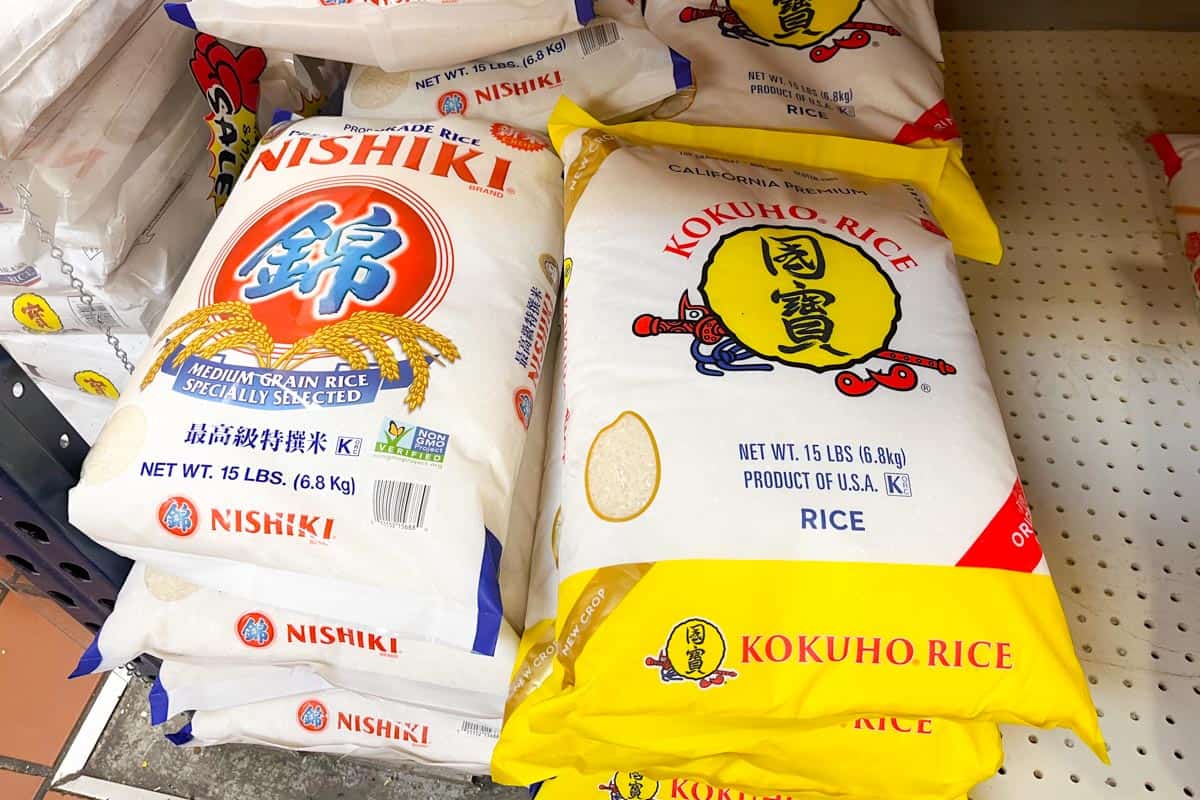
Rice
To help your onigiri hold its shape, you’ll want to use short- or medium-grain rice (also called sushi rice).
Short-grain rice is most common in Japan, but here in the U.S., I often use medium-grain rice without any issues. Japanese short-grain varieties like Koshihikari taste a bit better, but they can be a little pricey, haha.
Other types, like basmati, aren’t sticky enough to form a good shape. You can also use glutinous rice, but it will be stickier and chewier, more like mochi.
Brown rice works too, and I actually like it for its nutty aroma and flavor. Just make sure to cook it properly so it doesn’t dry out.
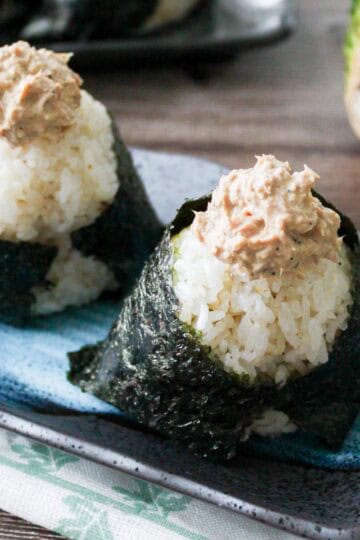
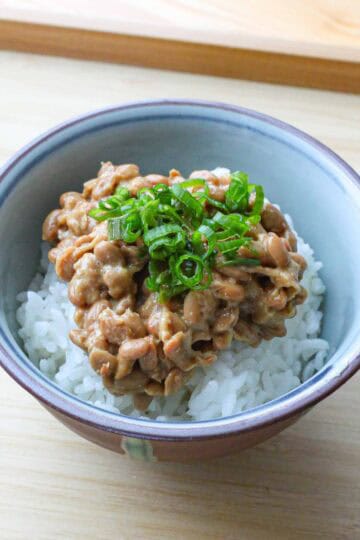
Onigiri Fillings and Mix-Ins
There are really no strict rules when it comes to fillings, almost anything tasty with rice can go inside an onigiri. If you make takikomi gohan (mixed rice), that’s already flavorful enough to enjoy on its own without a filling.
A few tips though: if you’re packing onigiri in a bento, avoid ingredients that spoil easily or release too much water. If you want to be extra safe for bento, choose fillings that naturally preserve the rice, like vinegar, ume (pickled plum), or shiso leaves.
Nori
Most onigiri are wrapped in plain nori, the same kind used for sushi, but seasoned nori can be really tasty too. You can crush it and mix it into the rice, or wrap small onigiri with seasoned sheets for extra flavor.
That said, not all onigiri need nori. It’s completely optional, so feel free to enjoy them just as they are.
🍳How to Make Onigiri (Step-by-Step)
1. Prepare rice
- Rinse the rice several times until the water is almost clear, then soak it for at least 30 minutes in summer and 60 minutes in winter (if using brown rice, soak for at least 5-6 hours).
- Cook it using a rice cooker, Instant Pot, or a pot on the stove.
- When it’s done, fluff the rice gently from the bottom using a rice paddle to keep it light and airy.
2. Shape Onigiri
Traditionally, onigiri is shaped by hand, but many people now use plastic wrap to avoid transferring bacteria. You can also use molds if you prefer. Here’s how to do it each way.
Hand Method (Easier Version)
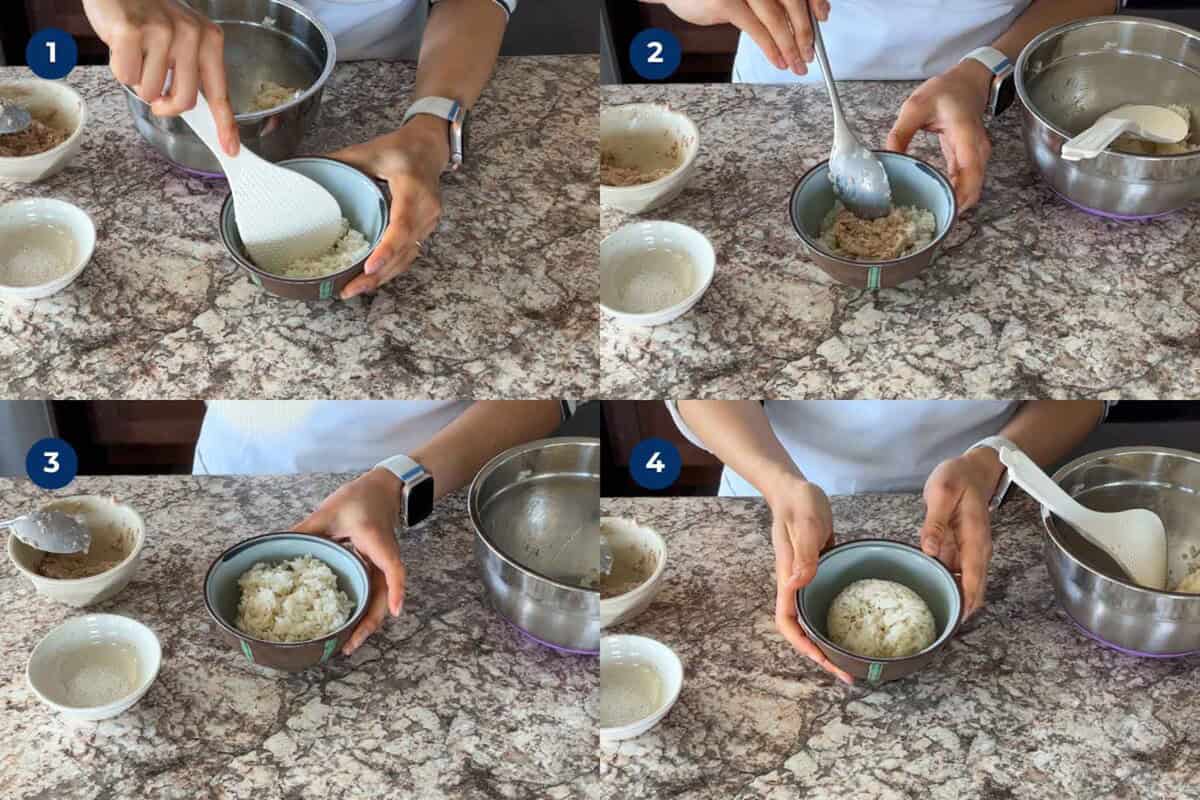
- Add the rice: Lightly wet the inside of a rice or soup bowl. Place about half a serving of rice into the bowl and gently spread it so it follows the curve of the bowl.
- Add the filling: Spoon your filling on top of the rice and spread it slightly toward the edges (this helps the flavor distribute evenly).
- Cover with rice: Add the remaining rice on top, spreading it to fully cover the filling.
- Form a ball: Gently shake or rotate the bowl to shape the rice into a loose ball.

- Wet your hands: Lightly wet your palms. Don’t use too much water, or the onigiri will turn soggy.
- Salt your hands: Rub the salt evenly across your palms. This seasons the rice and helps prevent bacteria.
- If you’re eating the onigiri right away, dip your middle finger up to the first joint in salt.
- If you’ll eat it later, dip both your middle and index fingers up to the first joint.
- Take out the ball: Flip the bowl to place the rice ball onto your palm.
- Shape the onigiri: Use the base of your bottom hand (near the wrist) and your fingers to form the flat sides, while your top hand gently shapes the top corner into a triangle. Turn the rice about 3–5 times, pressing very lightly.
💡 Don’t press too hard! Keeping it airy gives the onigiri its soft, fluffy texture.
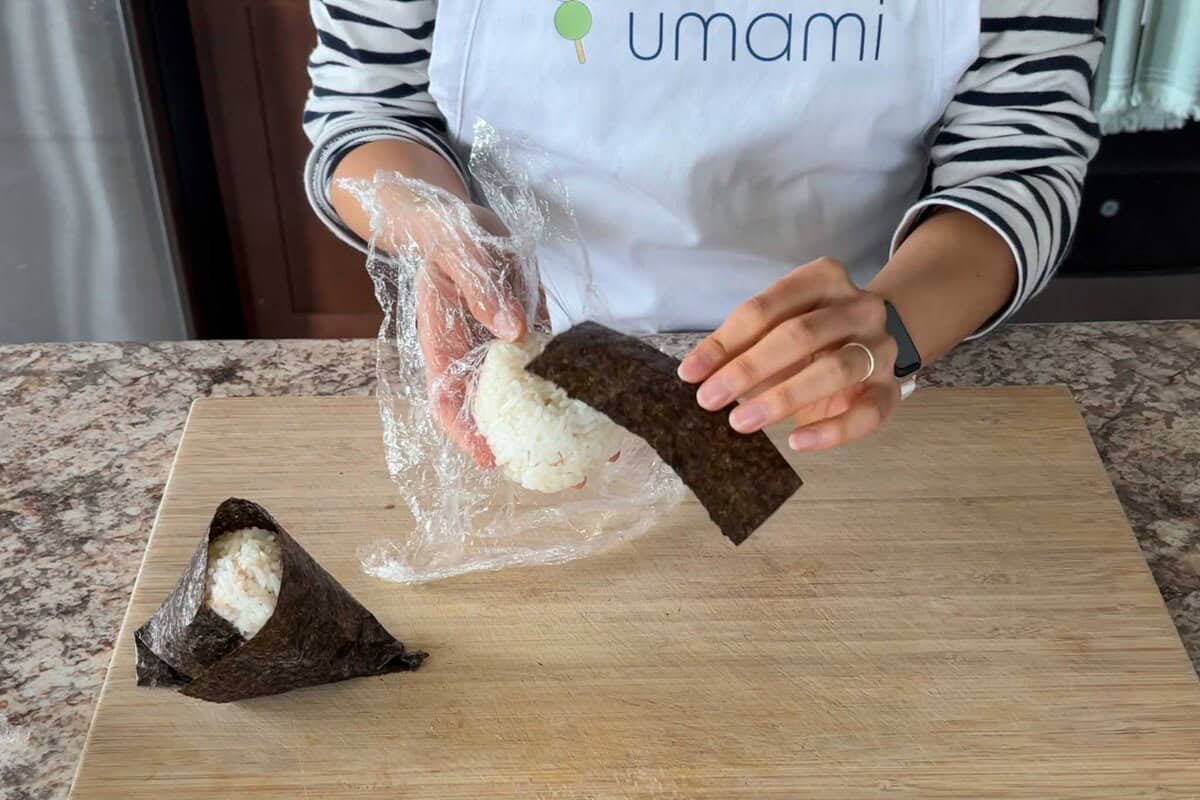
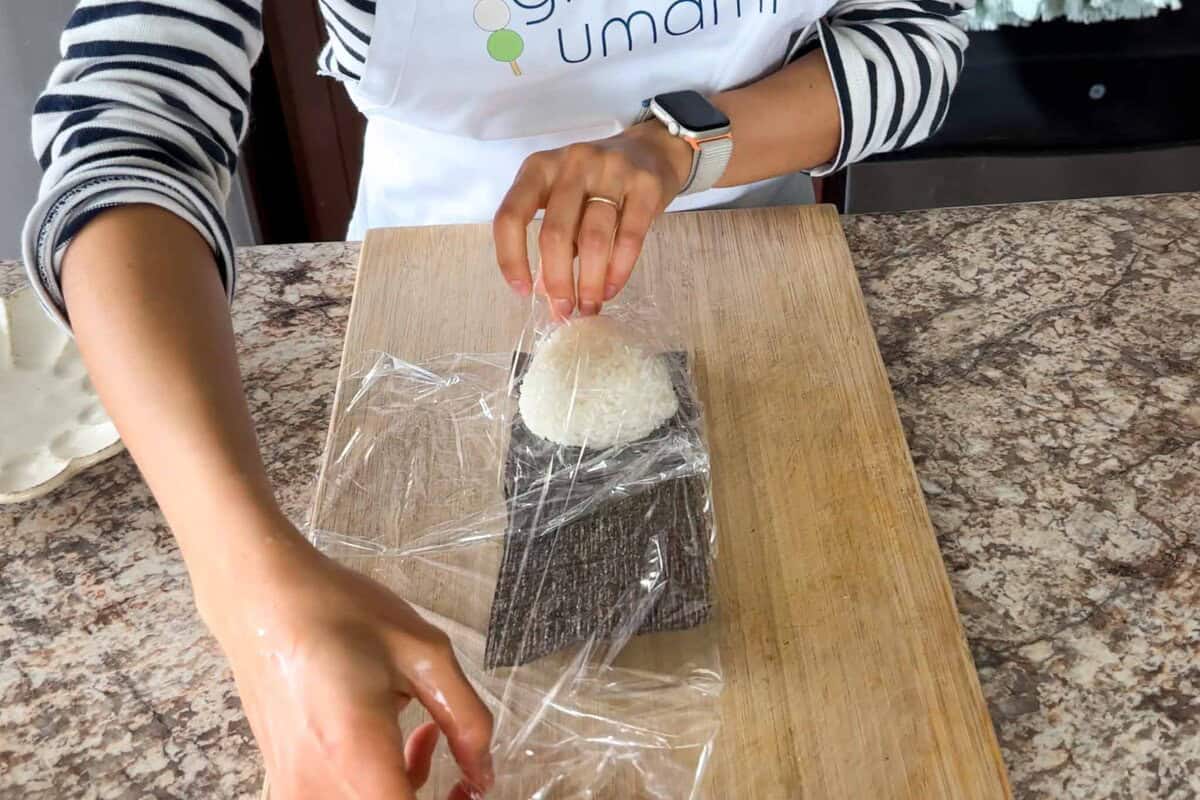
Plastic Wrap Method
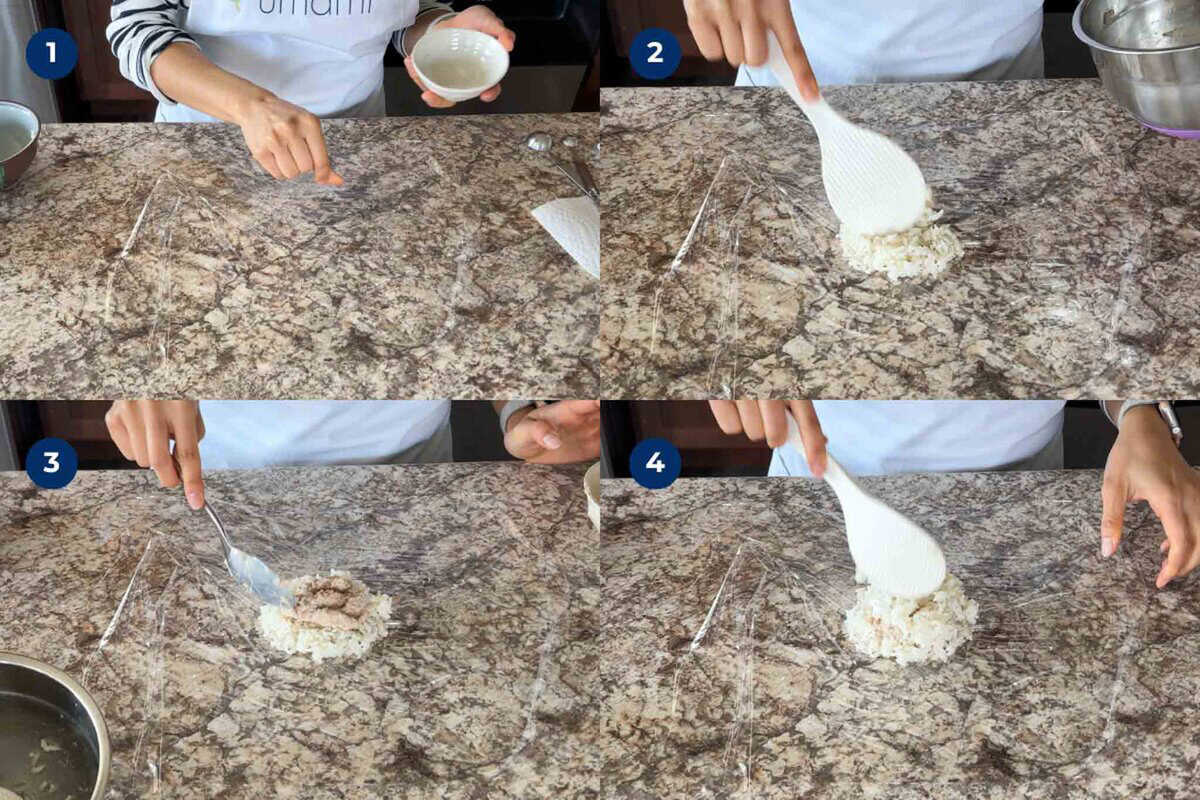
- Prep the wrap: Place a sheet of plastic wrap on a clean surface and sprinkle a little salt in the center.
- Add the rice: Add half of the rice portion and flatten the center slightly to create a small hollow for the filling.
- Add the filling: Add your filling, spreading it gently toward the edges in the hollow (without letting it spill out).
- Cover with rice: Cover with the remaining rice, spreading it to seal the filling completely.
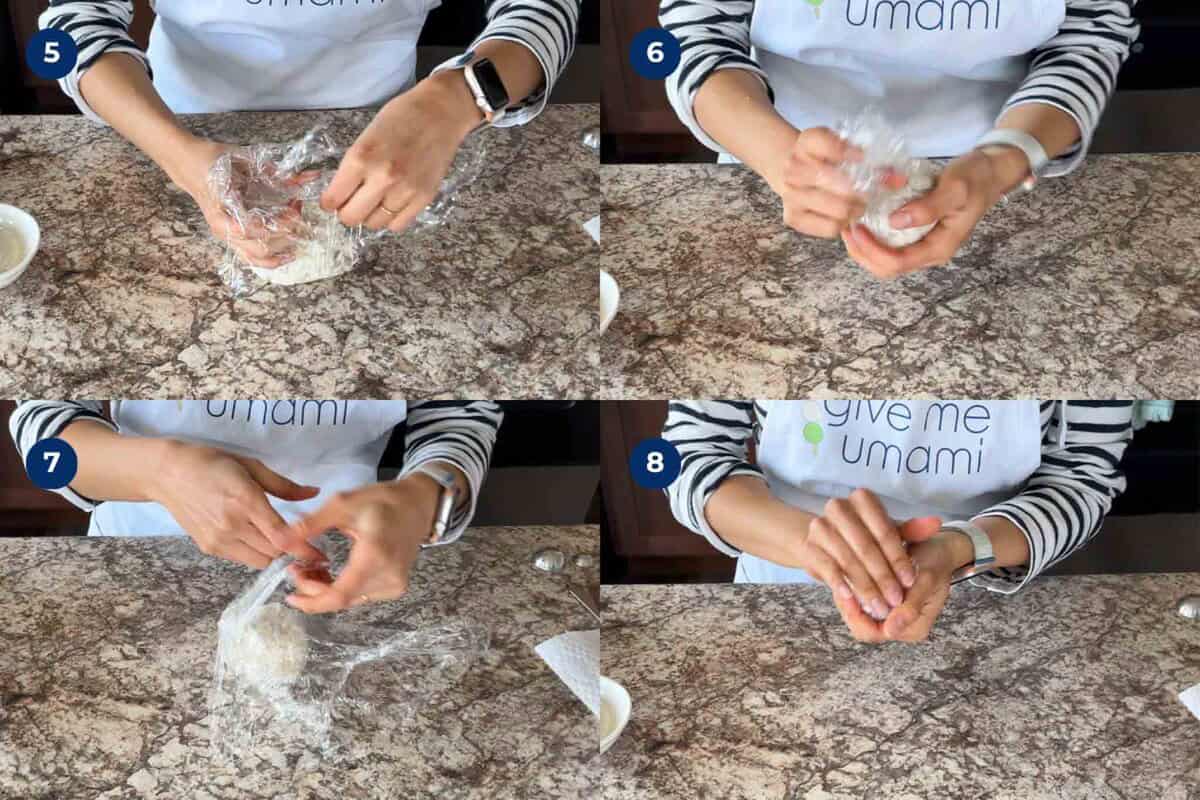
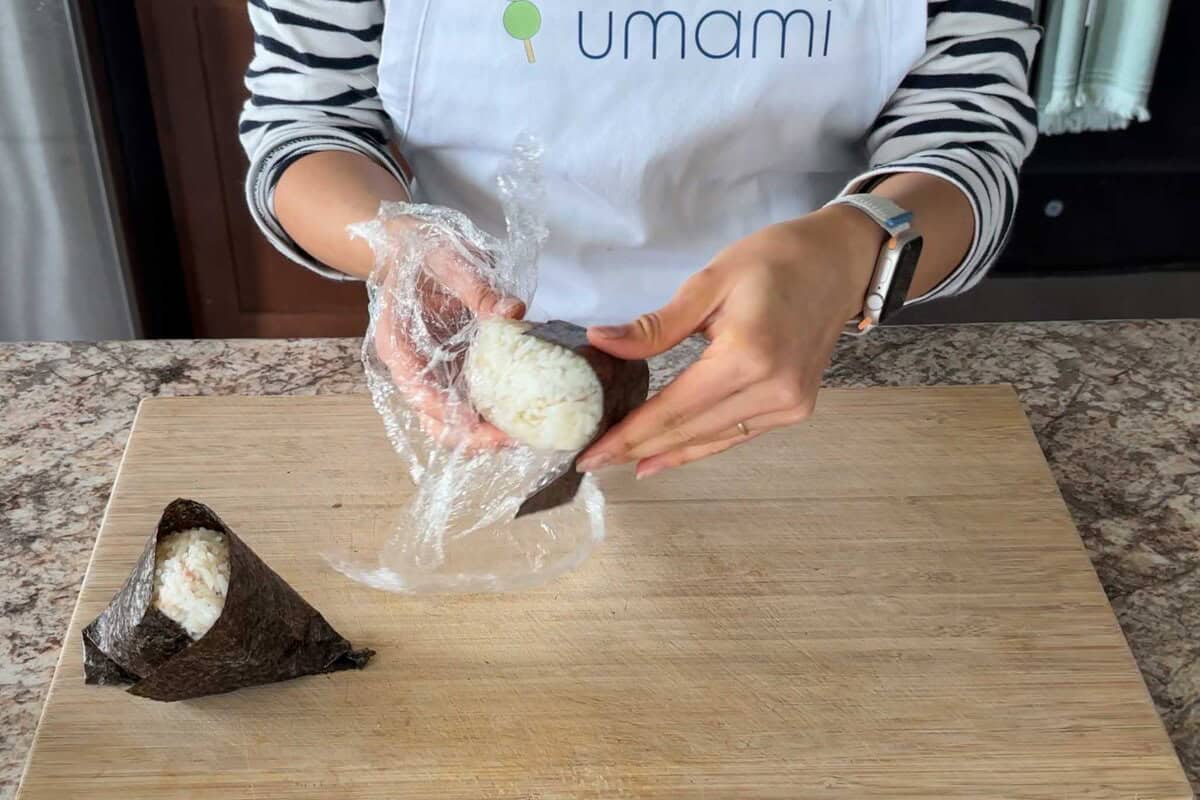
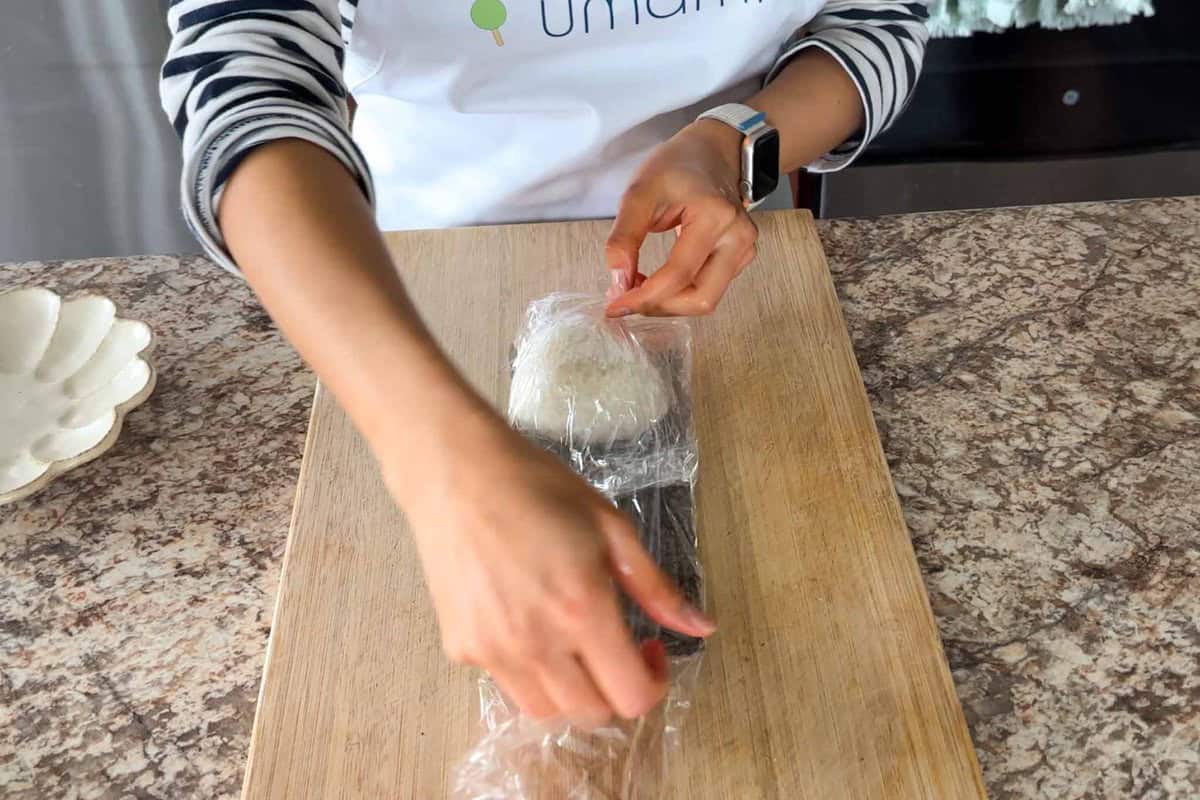
- Lift the wrap: Lift the edges of the wrap and close it loosely around the rice.
- Form a ball: Twist the wrap to form a ball.
- Wrap it again: Unwrap the onigiri, then rewrap it neatly.
- Shape the onigiri: Just like with the hand-shaping method, form the onigiri gently without applying too much pressure.
Mold Method
I usually don’t recommend molds because they can make onigiri dense or squishy, but if you prefer them:
- Place half a serving of rice in the mold, add the filling, and top with the rest of the rice.
- Press gently from the top, don’t press too hard!
- Remove the onigiri from the mold and wrap with nori if you like.
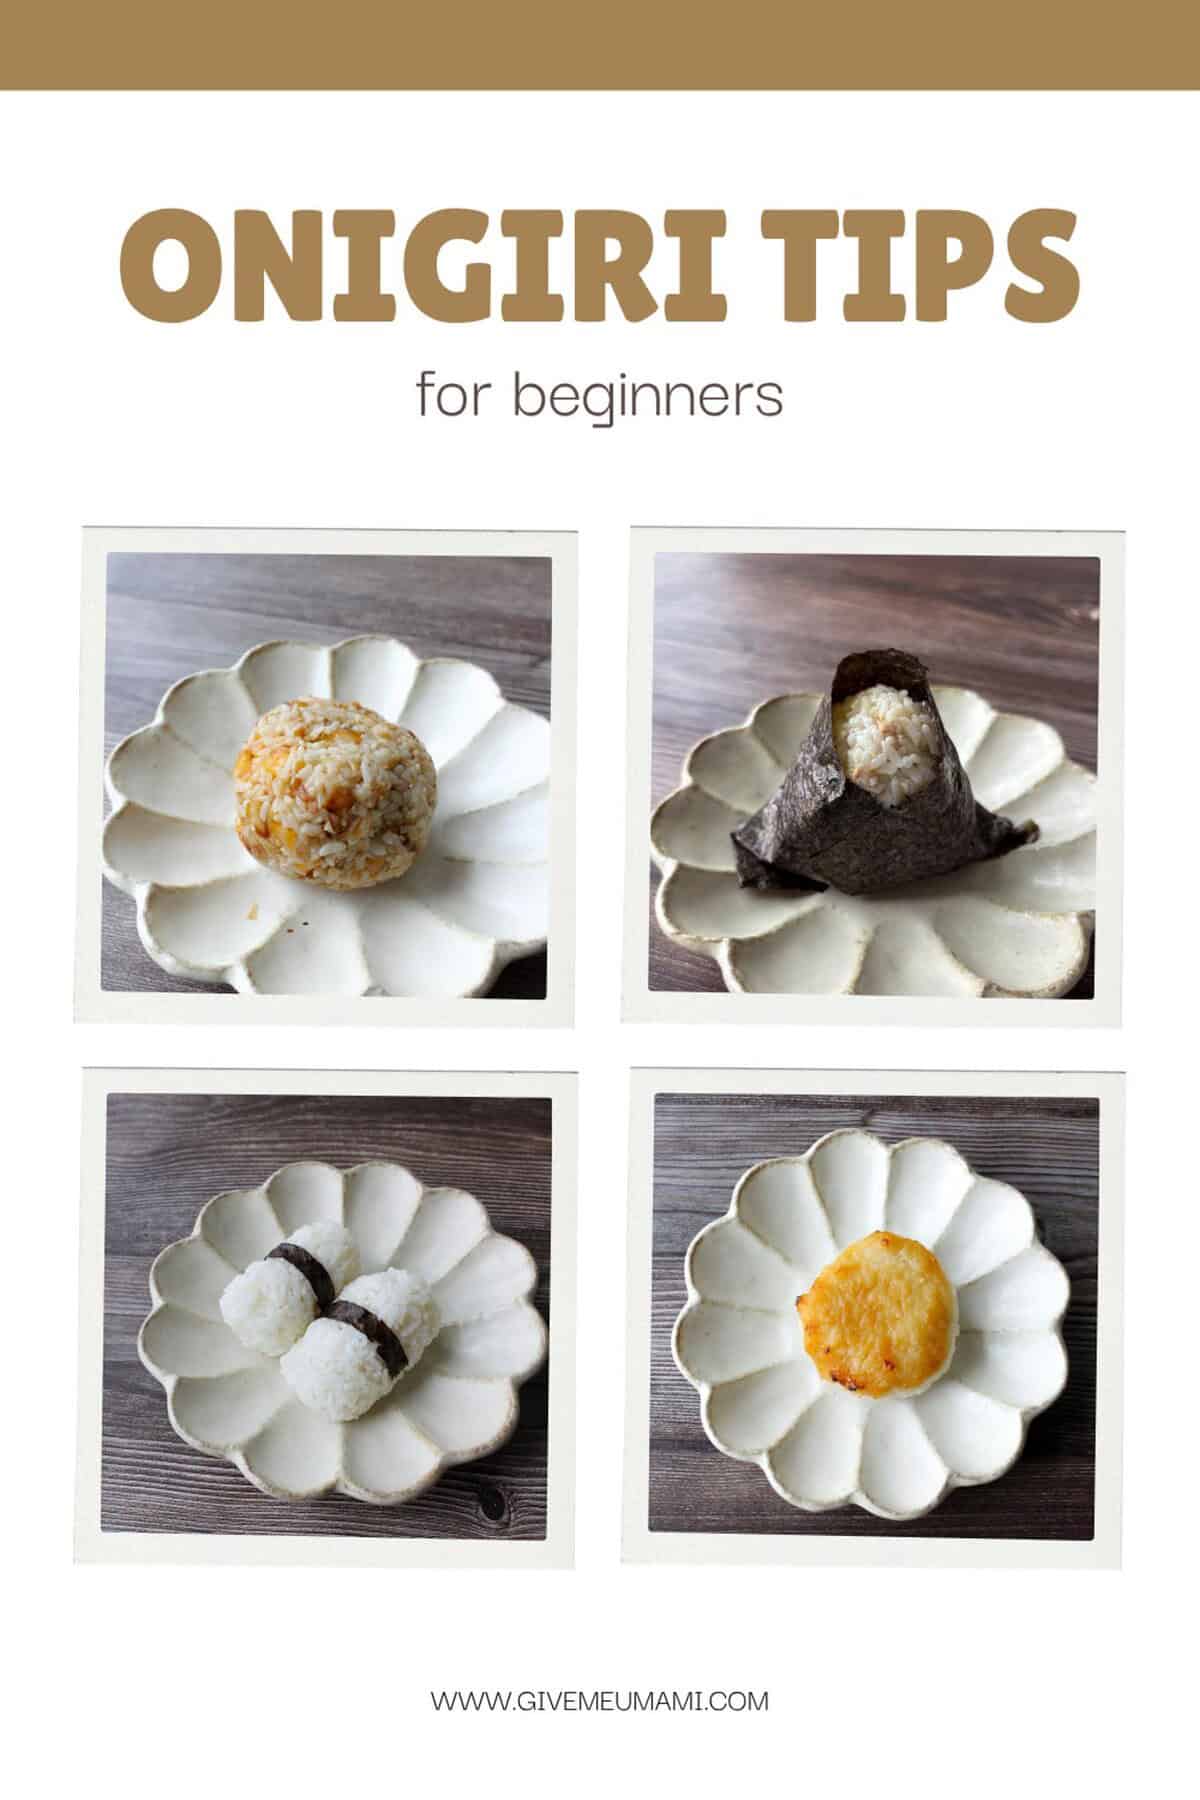
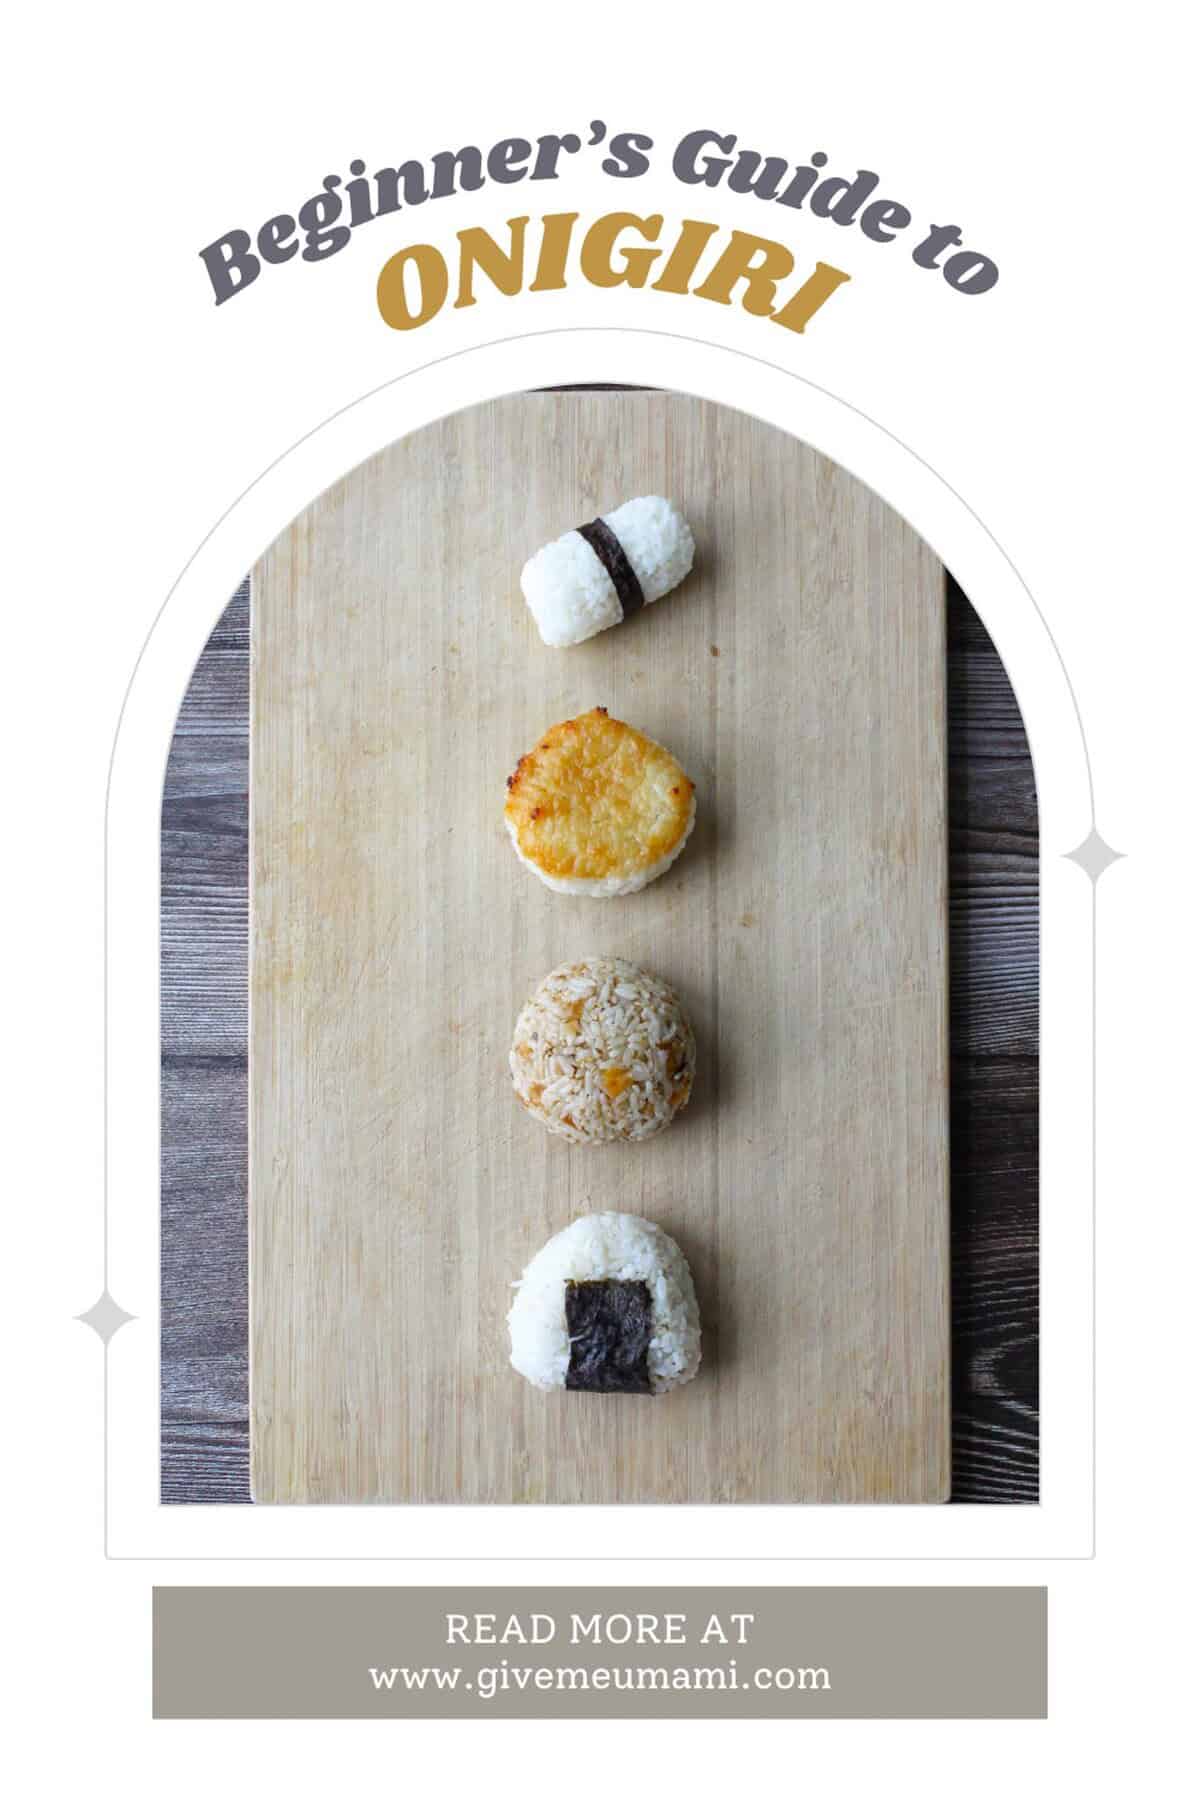
Common Onigiri Shapes
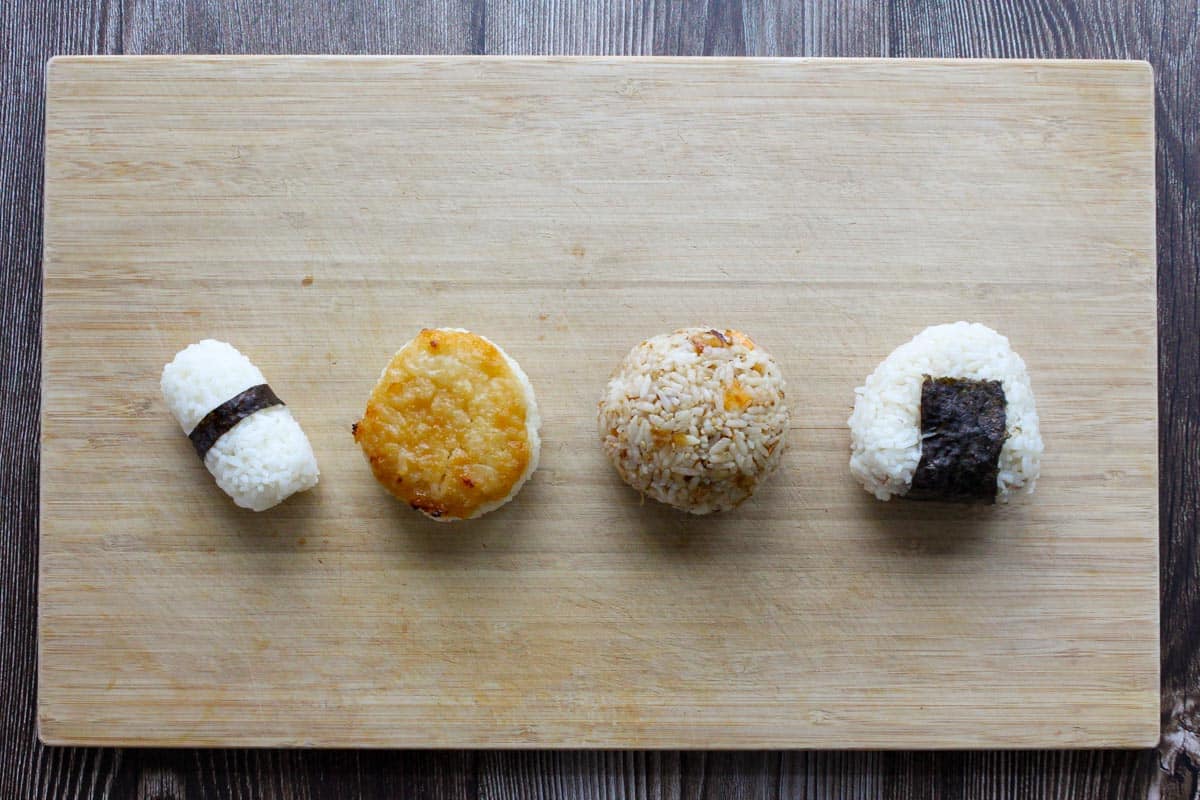
Here are four traditional shapes you can try:
- Cylinder or Barrel (Tawara-gata):
- Usually left plain, works well for simple rice balls in bento.
- Gently flatten the sides with your fingers, hold with the other hand, and roll lightly in your palm. Wrap with nori if desired.
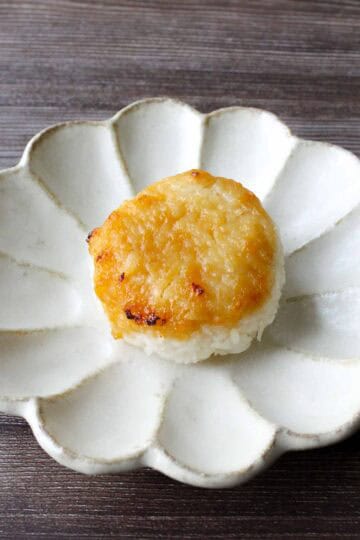
- Disk (Enban-gata):
- Flat and round, ideal for yaki onigiri (grilled) or brushing toppings like miso or soy sauce.
- Place the rice on your left palm. Use your right hand to gently cover the side and press the center with your left thumb. Move your right hand while rotating the rice counterclockwise, shaping it into a slightly flattened round.
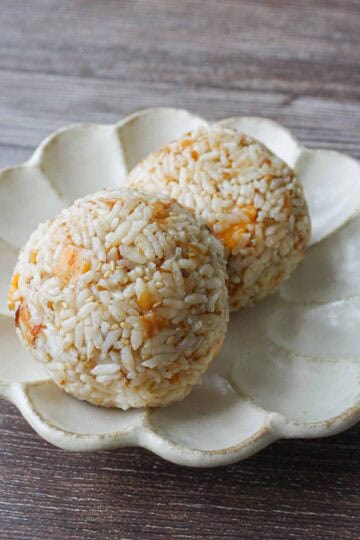
- Round (Maru-gata):
- Soft, dome-like shape, great for bite-sized or decorative onigiri.
- Use cupped hands to roll gently, keeping it round and fluffy.
- Triangle (Sankaku-gata):
- Most common shape, perfect for stuffing fillings.
- Formed by gently pressing the sides with your bottom hand and shaping the top corner with your top hand.
💡 Tip: Triangle and round shapes are best for stuffed onigiri, while barrel and disk shapes are better for plain or grilled versions.
3. Wrap with Nori
There are no strict rules for wrapping nori, but here are two common ways:
Example 1
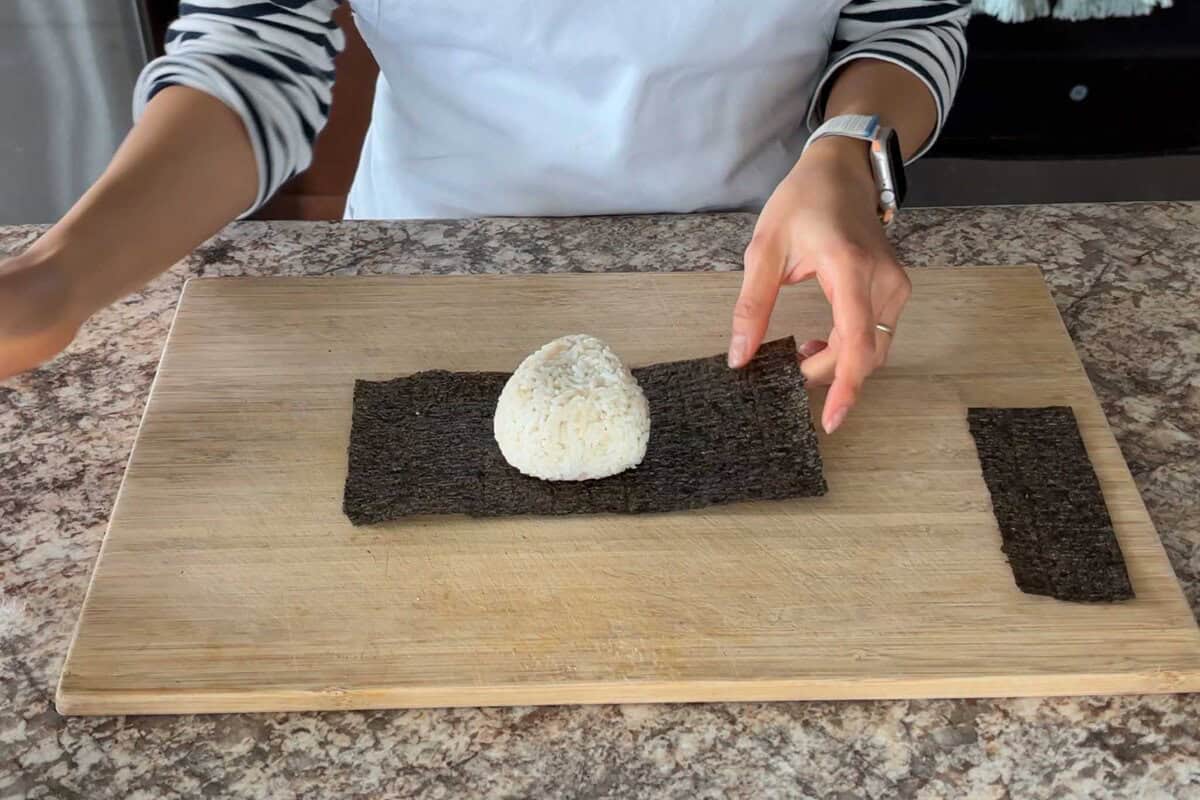
Step 1: Lay a sheet of nori horizontally and place a triangular onigiri in the center.
Step 2: Fold the edges over the rice, tucking the ends under to secure.
Step 2: Fold the edges over the rice, tucking the ends under to secure.
Step 3: Tuck the bottom edge of the nori along the bottom of the onigiri.
Optional: Top with a bit of filling so it’s easy to see what’s inside.
Example 2
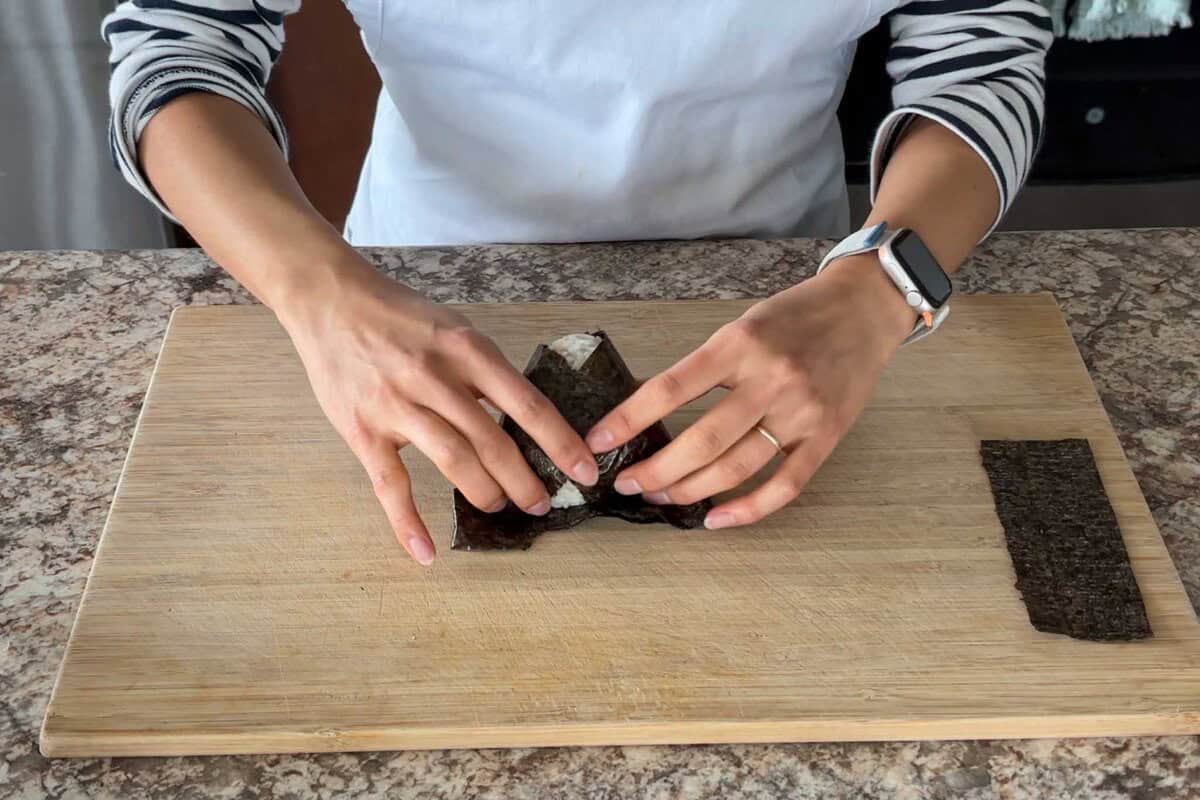
Step 1: Use a shorter, rectangle-shaped nori sheet.
Step 2: Fold the rice into the nori.
How to keep it from getting soggy
I found this method online while researching for this post and wanted to share it with you! If you’re packing onigiri in a bento, these steps will help keep the nori crispy.
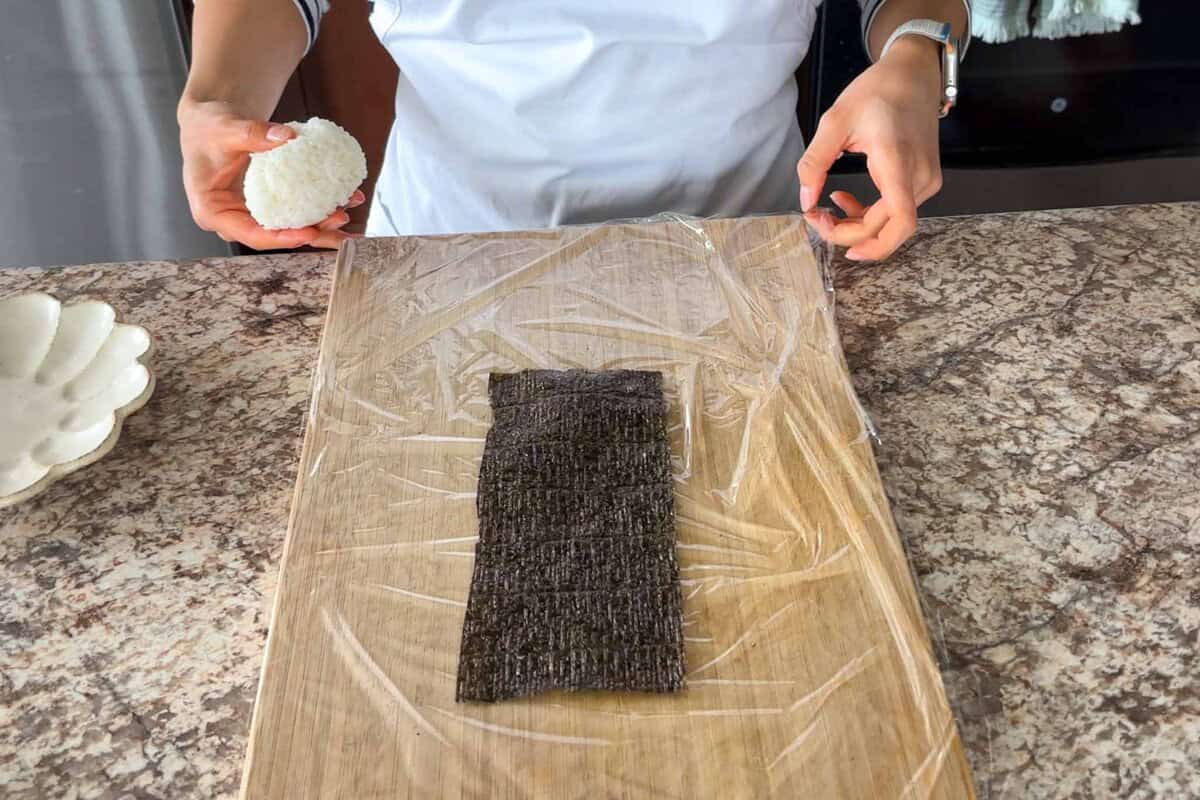
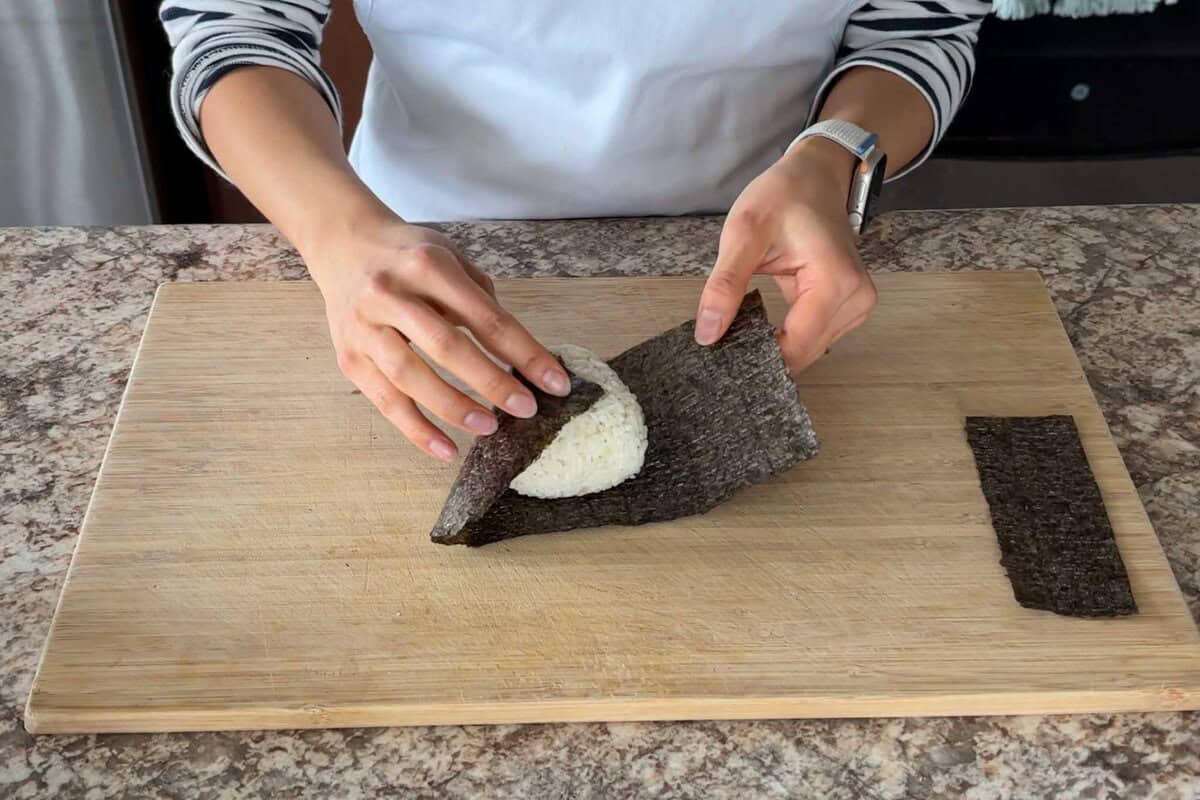
Step 1: Leave a small space at the bottom for one rice ball and place the nori.
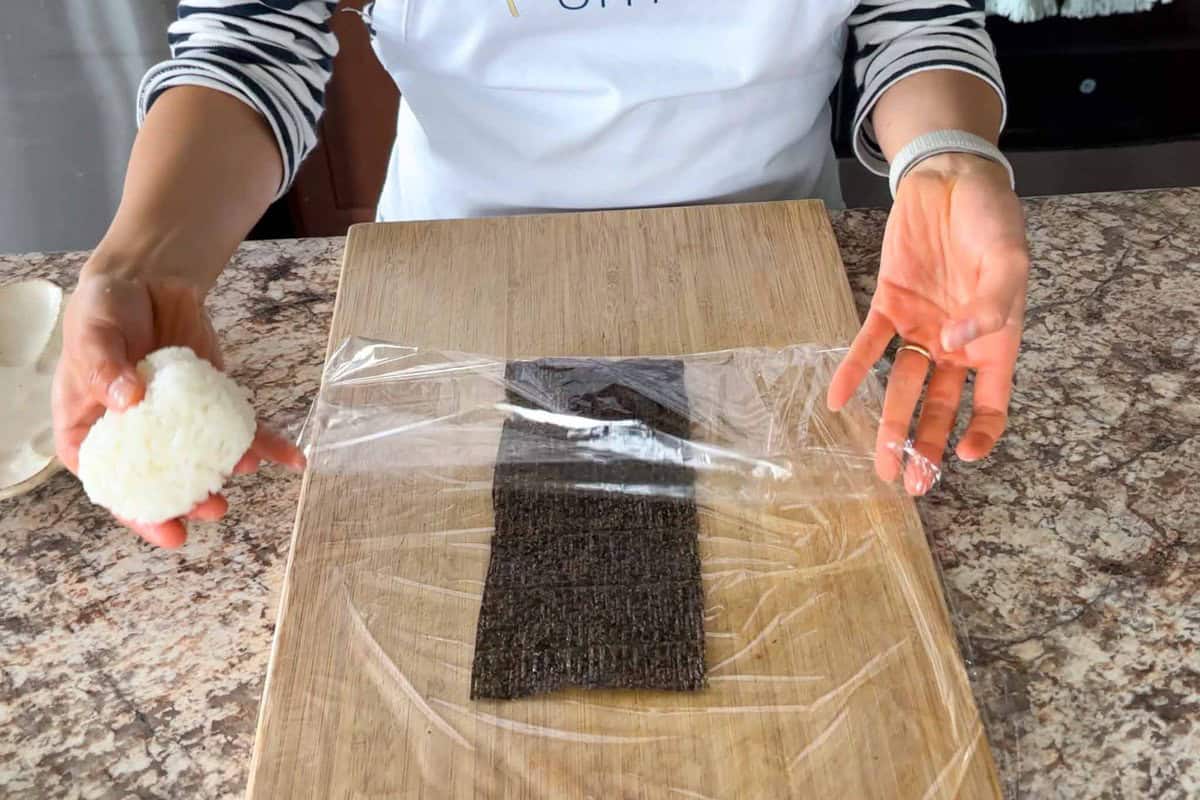
Step 2: Fold the bottom layer of the wrap over the nori.
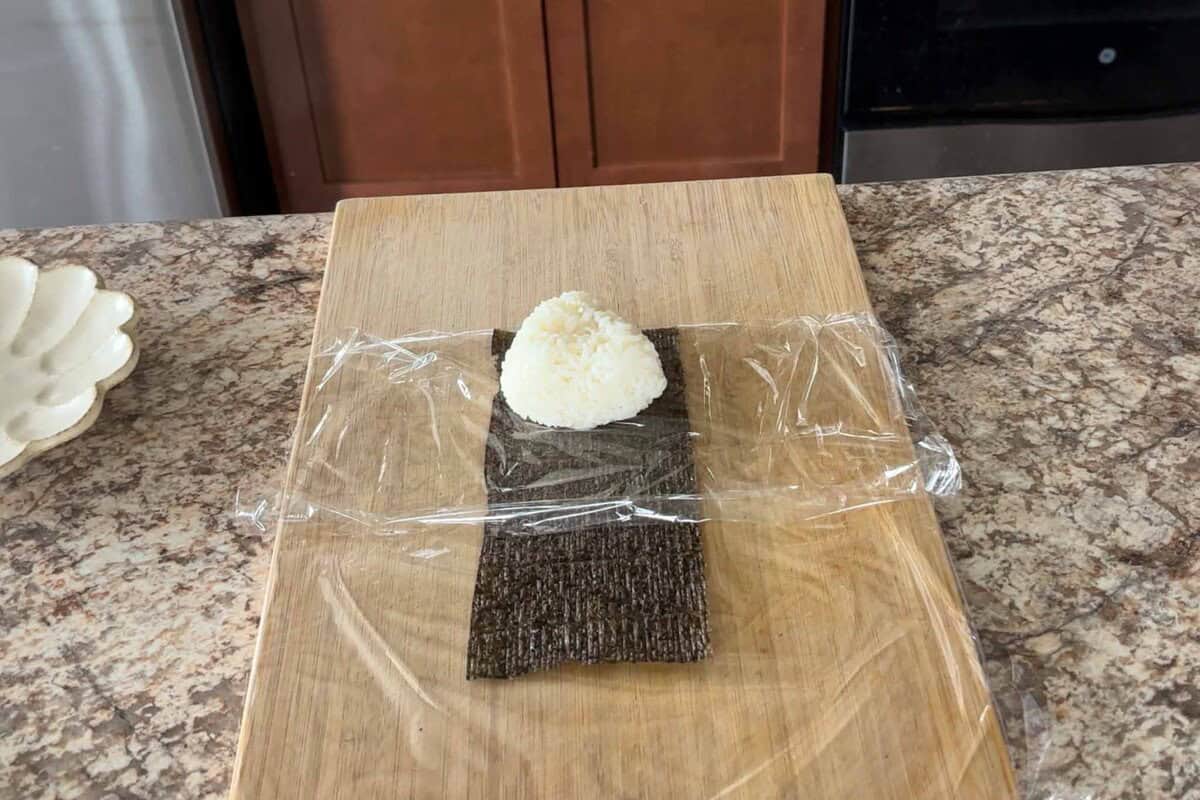
Step 3: Place the onigiri on top of the wrap in an inverted triangle shape, with the pointed end facing towards you.
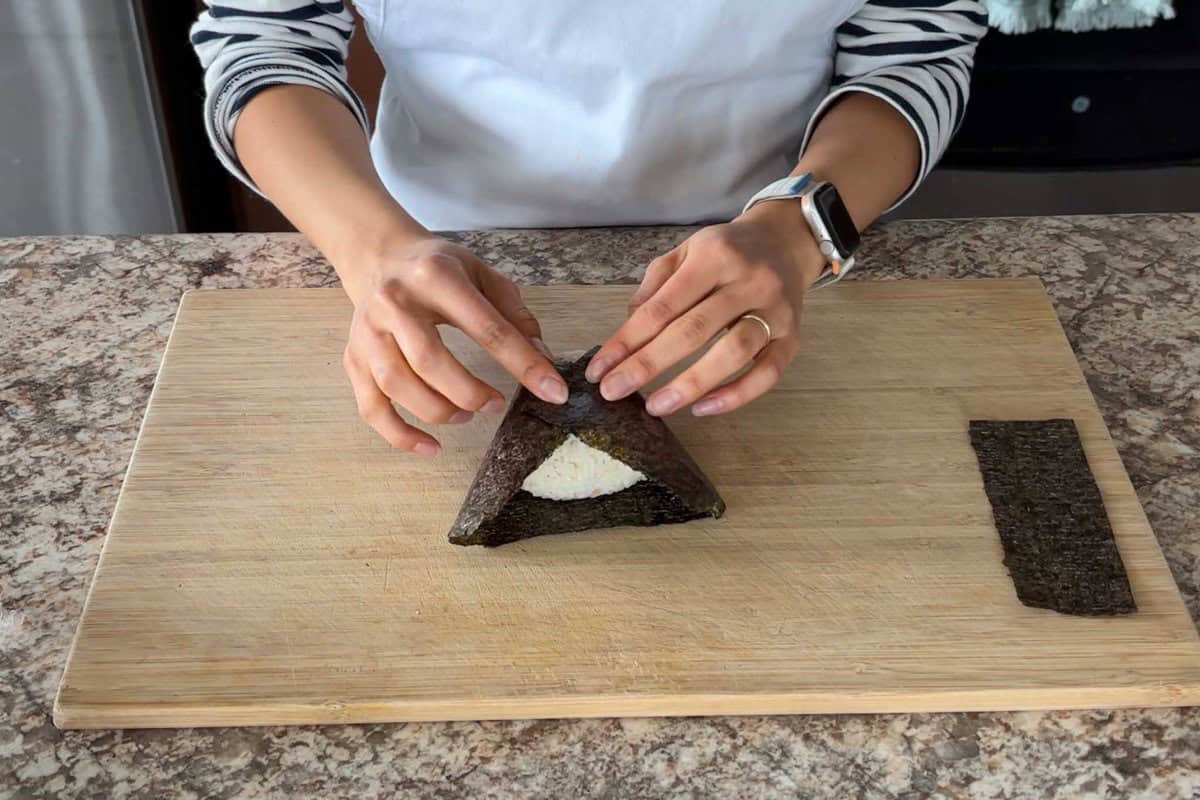
Step 4: Fold the left and the right wraps over the onigiri and the nori.
Step 4: Fold the left and the right wraps over the onigiri and the nori.

Step 5: Fold the whole thing from bottom to top to secure.
🔪Onigiri Tips & Techniques
- Soak the rice: soak the rice for at least 30 minutes in summer and 60 minutes in winter before cooking so it becomes moist and soft to the core (or soak for at least 5-6 hours if using brown rice).
- Avoid other types of rice: onigiri relies on the stickiness of short or medium-grain rice, so avoid using types like basmati.
- Mix the rice from the bottom: once the rice is cooked, mix it gently from the bottom to release steam so the onigiri won’t be soggy.
- Use fresh rice as much as possible: rice gets drier as the days pass, so use fresh rice if possible, or use properly frozen rice (microwave before use).
- Use warm but not too hot rice: it’s important to use warm rice because cold rice doesn’t stick together, but avoid using rice that’s too hot because it’ll hurt your hands.
- Wet and salt your hands: if you make onigiri without plastic wrap, it’s very important to wet your hands so rice doesn’t stick, and rub salt into your palms so bacteria don’t spread.
- Avoid overstuffing: I know, I love onigiri packed with filling too, but the more filling you put, the harder it becomes to shape the onigiri. So until you get used to shaping onigiri, be patient and don’t overstuff it.
- Don’t put too much pressure: onigiri isn’t supposed to be a rock! Don’t press too hard, whether using a mold or your hands, so each grain keeps its shape and the rice stays airy but firm enough to hold together.
- Wrap nori right before serving: nori gets soggy over time, so if you want crispy nori, wrap it just before serving.
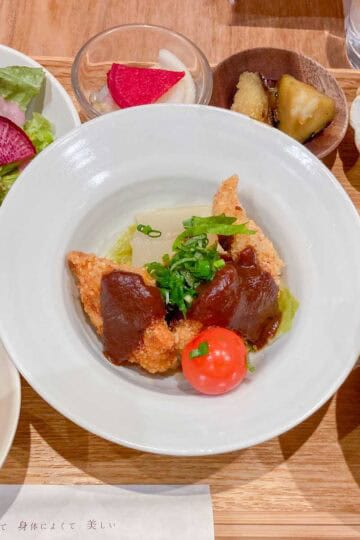
🥣What to Serve with Onigiri
You can enjoy onigiri on its own as a snack, or pair it with miso soup and pickled vegetables to make it feel like an onigiri teishoku. If your onigiri has a protein-rich filling, like karaage, pairing it with miso soup and vegetable sides creates a complete and satisfying meal!
🗄️Storage & Reheating Tips
💡Avoid fillings that are raw, contain mayonnaise, or have high moisture because they don’t freeze well.
- To store: After shaping, wrap each onigiri in plastic wrap while it’s still warm. Once cooled, place them in an airtight container.
- Fridge: Store for up to 1 day.
- Freezer: Store for up to 1 month.
- To reheat: Microwave frozen onigiri while still wrapped in plastic wrap for about 1 minute, or until warmed through.
- Room temperature storage: It’s best not to leave onigiri at room temperature. Eat them right away or store them in the fridge or freezer.
- Food safety tips:
- Use plastic wrap to avoid direct hand contact with rice.
- Add a little salt or vinegar when cooking the rice to help preserve it.
- Choose fillings that stay fresh longer.
- For bento: If packing onigiri for lunch, keep them cool with an ice pack and eat within half a day.
❓Frequently Asked Questions
Onigiri is a simple Japanese rice ball seasoned with salt and often wrapped in nori for an easy, portable meal. Sushi uses vinegared rice, often paired with raw fish or seafood, and is traditionally considered a more refined or special dish.
Over to You!
I hope you’re feeling excited and inspired to make onigiri right away!
Onigiri is super versatile, and there are no rules, so have fun experimenting with your own unique fillings. I’d love to hear your favorites in the comments below 🙂
🎁Grab your FREE onigiri guide! This includes the basic information on onigiri and four onigiri recipes to get you started with your onigiri journey smoothly.
📌Pin This Guide For Later!
Comments
No Comments