
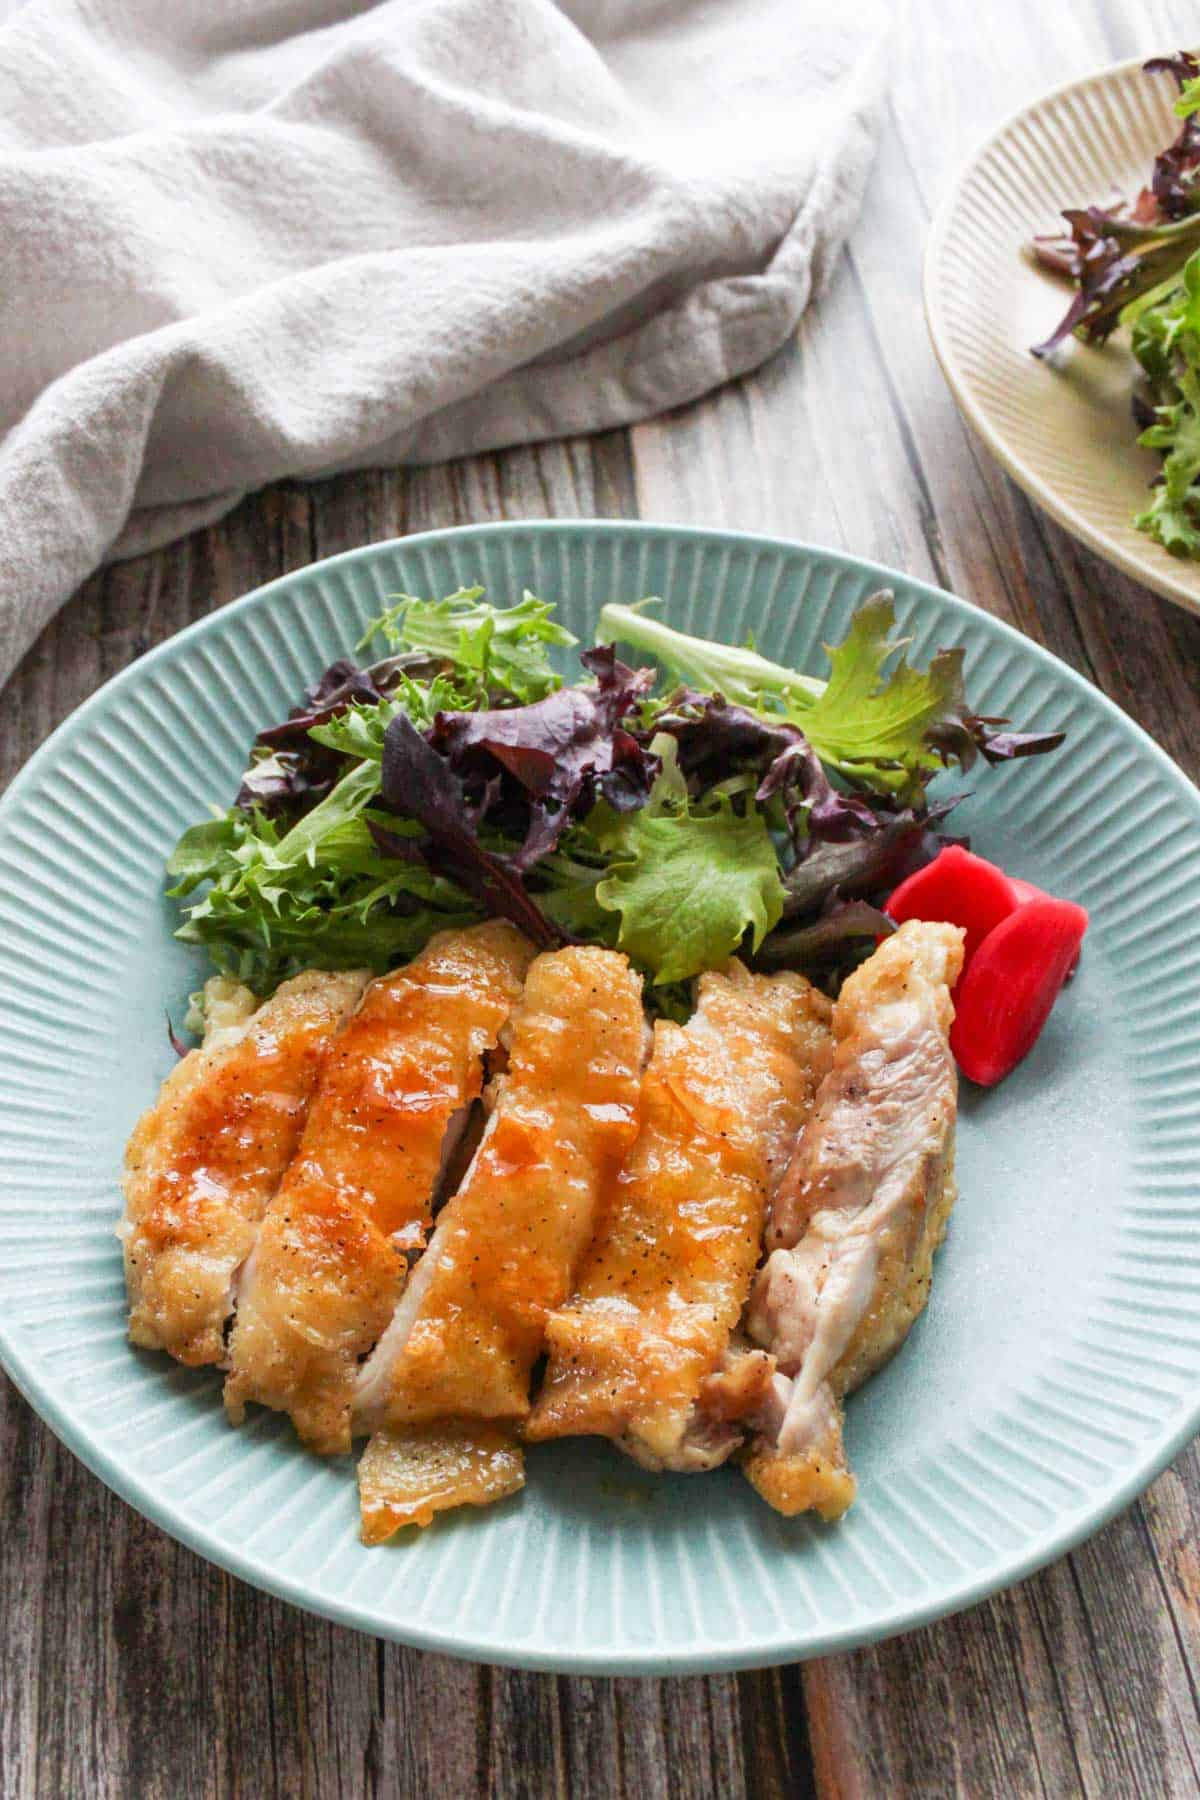
Authentic teriyaki chicken made with simple ingredients! Juicy, crispy, and coated in a rich, sweet-savory sauce loved for generations.
This recipe is super easy and quick—just 7 ingredients (yep, including salt and pepper!) and only 30 minutes to make. Perfect for those busy nights when you want something delicious without the hassle.
And let’s be real—who doesn’t love that sweet and savory teriyaki flavor? It’s always a hit and a great way to introduce someone to Japanese food!
💡 Interested in learning Japanese cooking? Check out my step-by-step guide!
Why You'll Love This Recipe
- Not Too Sweet or Salty: Like my other recipes, I made this one to have the perfect sweet-and-salty balance—flavorful but not overpowering.
- No Sugar Added: We’re using only mirin to sweeten the sauce, so it won’t have a strong “SUGAR!” flavor. Instead, mirin adds a mild sweetness with a touch of umami.
- Easy & Quick: Simple ingredients, easy steps—just what you need for a busy weeknight dinner!
Notes on Ingredients
See the recipe card for the full ingredients list.
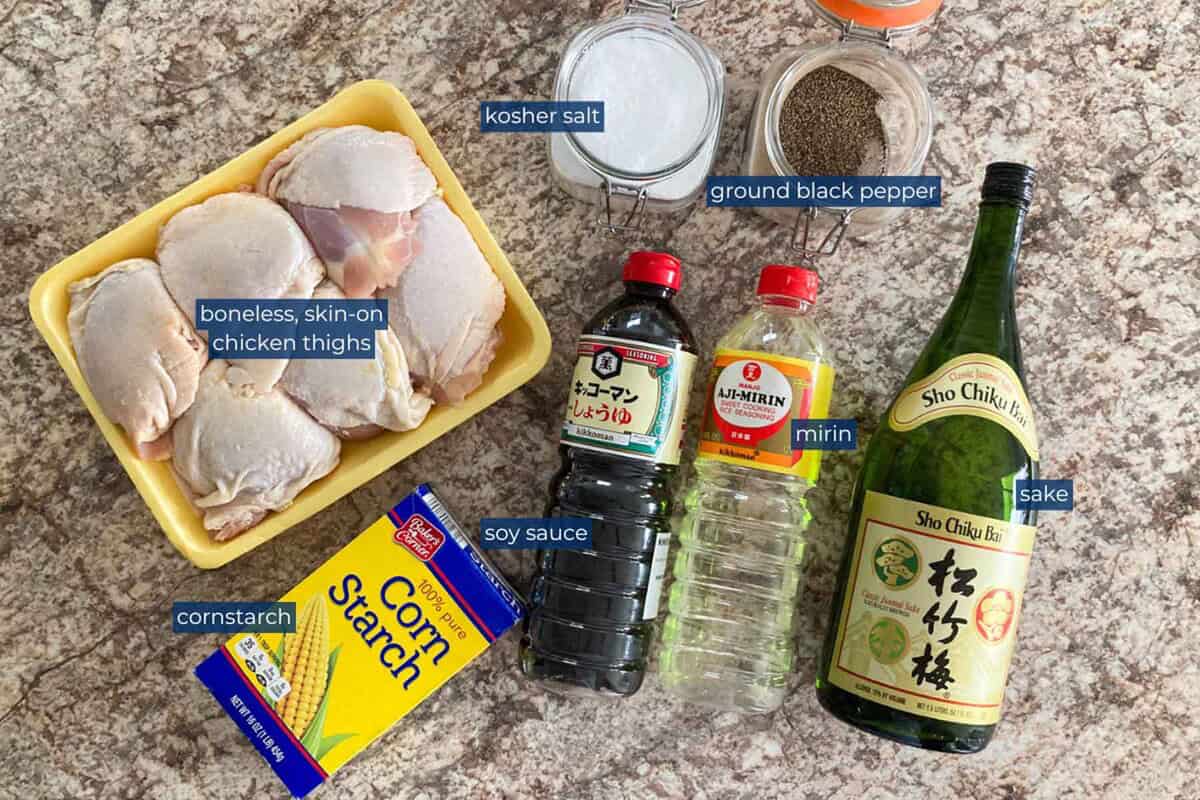
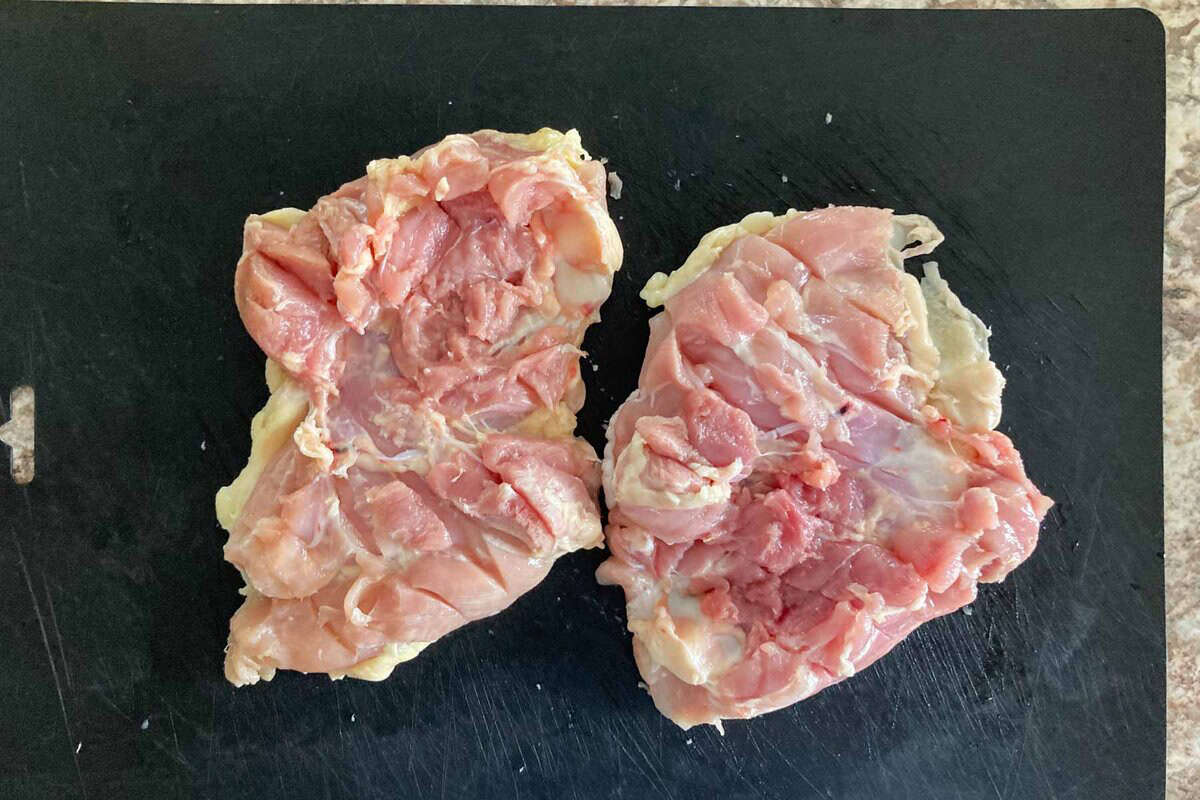
- Chicken Thighs: In Japan, teriyaki chicken is typically made with boneless, skin-on chicken thighs, and I highly recommend using them too! Since they’re hard to find in the U.S., I usually buy bone-in, skin-on thighs and remove the bones myself with a knife.
Authentic Teriyaki Sauce
Authentic teriyaki sauce is super simple—just soy sauce, sake, and mirin. If you prefer a bit more sweetness, you can add a little sugar.
- Soy Sauce: Brings the umami and just the right amount of saltiness.
- Sake: Helps tenderize the chicken and makes it extra juicy while boosting flavor.
- Mirin: Adds a mild sweetness and umami. If you don’t have it, you can mix sake and sugar (1 tablespoon of mirin = 1 tablespoon of sake + 1 teaspoon of sugar), but the flavor won’t be quite as deep.
You can easily batch-make homemade teriyaki sauce and use the leftovers for anything, such as beef, salmon, pork, tofu, and vegetables!
FYI–although bottled teriyaki sauce is common in the States, I’ve never seen or used it in Japan.
Substitutions and Variations
- Teriyaki Sauce Variations: Traditional teriyaki sauce is made with just three simple ingredients, but you can mix things up by adding rice vinegar, garlic, or ginger for extra flavor.
- Other Proteins: This sauce isn’t just for chicken! Try it with tofu, salmon, or your favorite protein for a delicious twist.
- Gluten-Free Version: Swap regular soy sauce for a gluten-free option like tamari.
- Vegan Version: Use firm tofu or another plant-based protein instead of chicken for a tasty vegan-friendly teriyaki!
How to Make Teriyaki Chicken
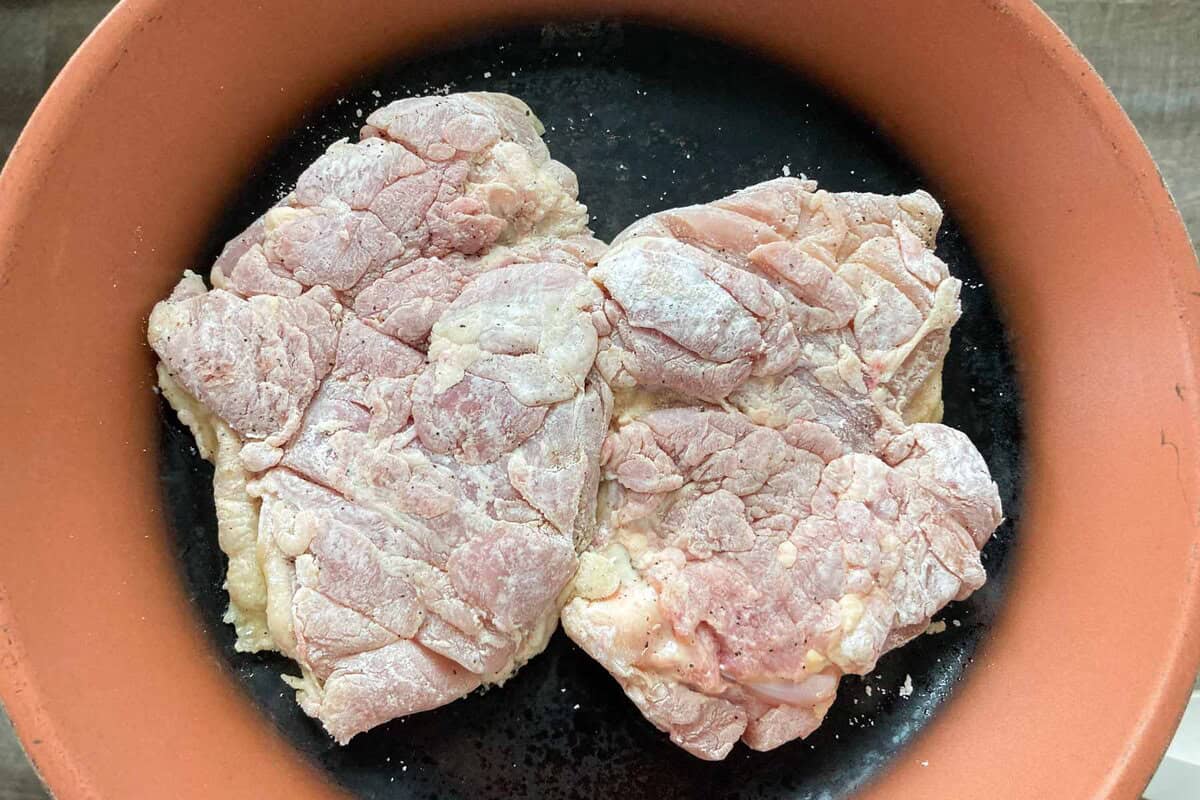
Step 1: Make small cuts on the chicken every 0.8 inch (2 cm)
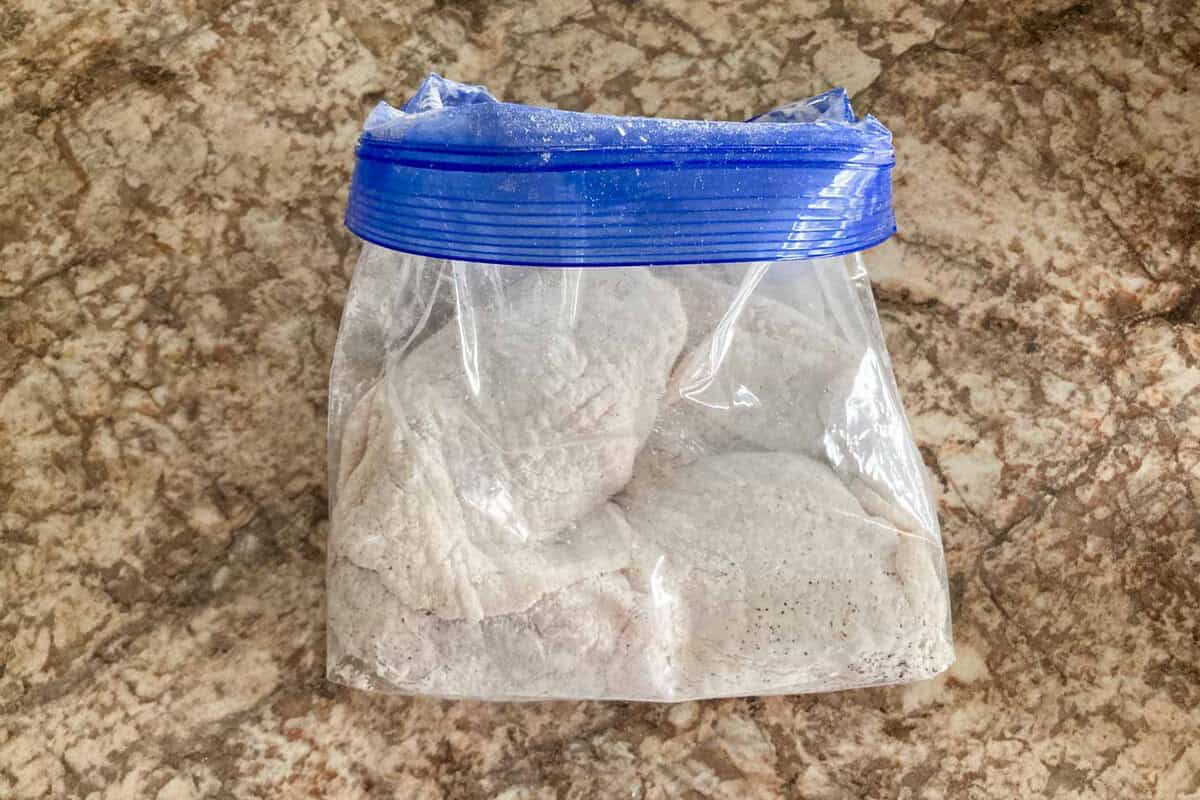
Step 2: Toss it in a plastic bag with cornstarch, salt, and pepper, and shake until coated
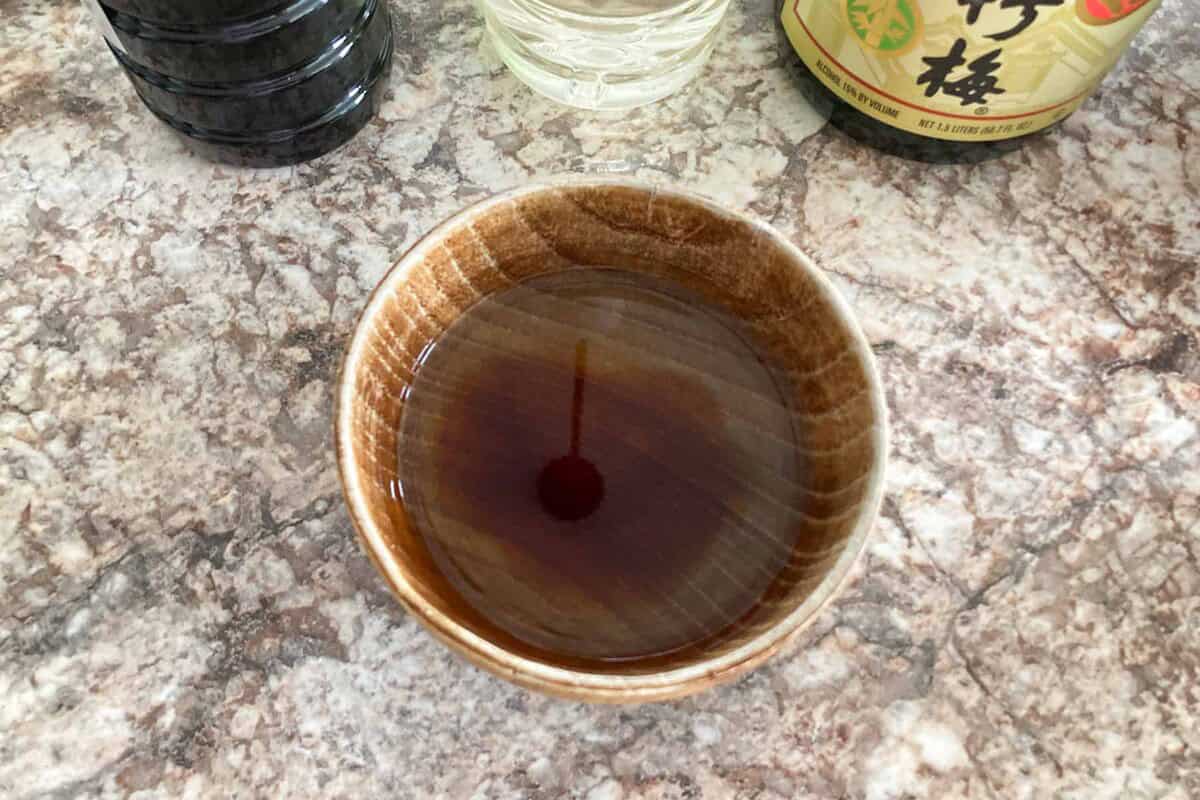
Step 3: Whisk the sauce ingredients in a small bowl and set aside
Step 4: Heat a pan over medium heat. Place the chicken skin-side down and cook for 8 to 10 minutes
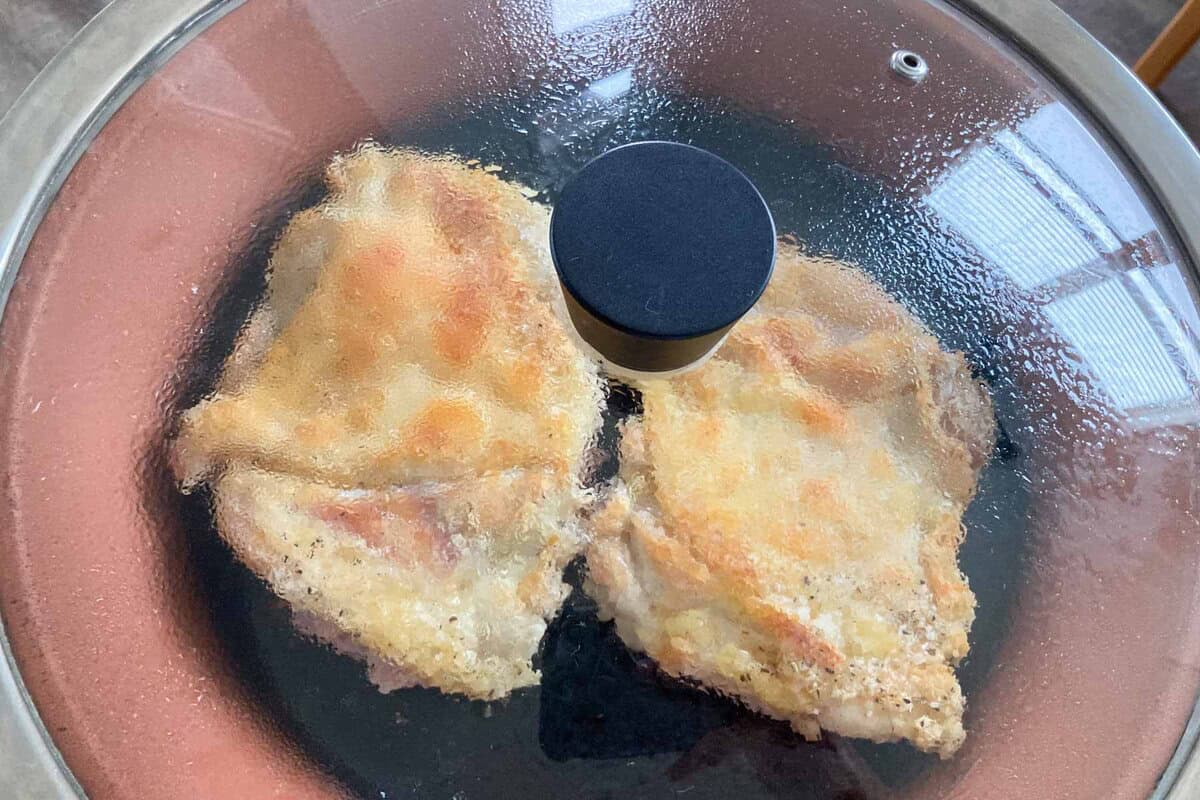
Step 5: Flip, cover, and cook for another 1 to 2 minutes on low
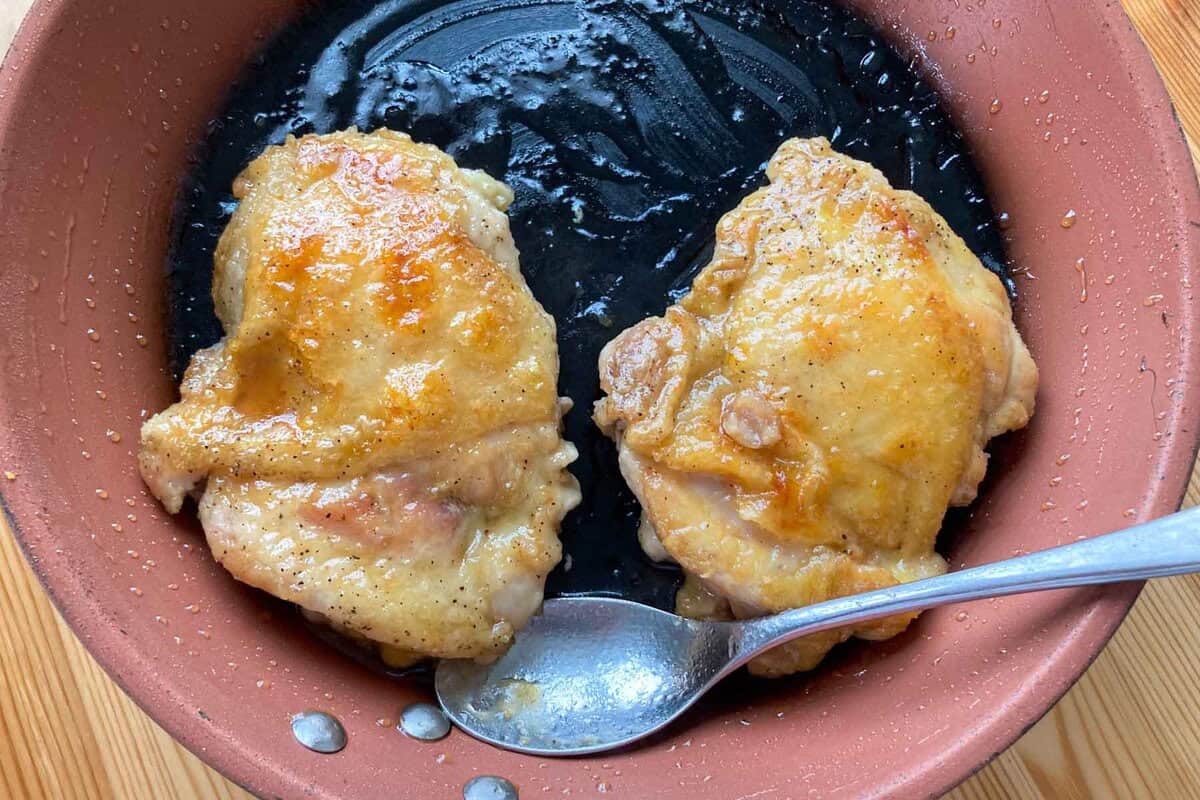
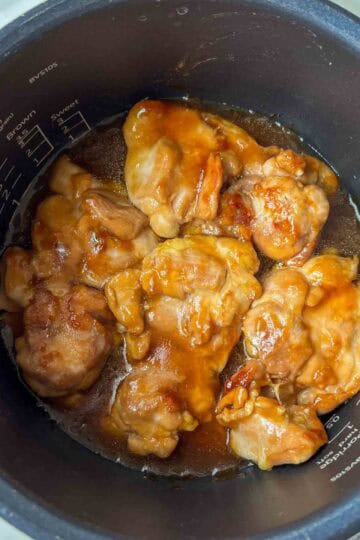
Step 6: Wipe off excess oil with a paper towel, then pour in the sauce. Simmer over medium heat, spooning it over the chicken until thickened
Kurumi's Tips
- Use the Right Type of Chicken: For the juiciest, crispiest teriyaki chicken, I recommend boneless, skin-on thighs. They can be hard to find in the U.S., so I usually buy bone-in, skin-on thighs and remove the bones myself. Boneless, skinless thighs work too—they just won’t get as crispy. You can also use chicken breasts, but they tend to be a bit drier. If you’re using skinless chicken, add a tablespoon of neutral oil to help crisp it up!
- Grilled vs. Baked vs. Pan-Fried: In Japan, teriyaki chicken is usually pan-fried (just like the name suggests!). But if you prefer a more American-style version, you can grill or bake it too. Just be sure to marinate the chicken in the teriyaki sauce first so it soaks up all that delicious flavor!
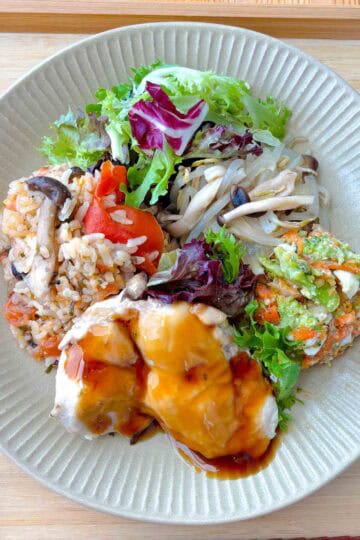
What to Serve with Teriyaki Chicken
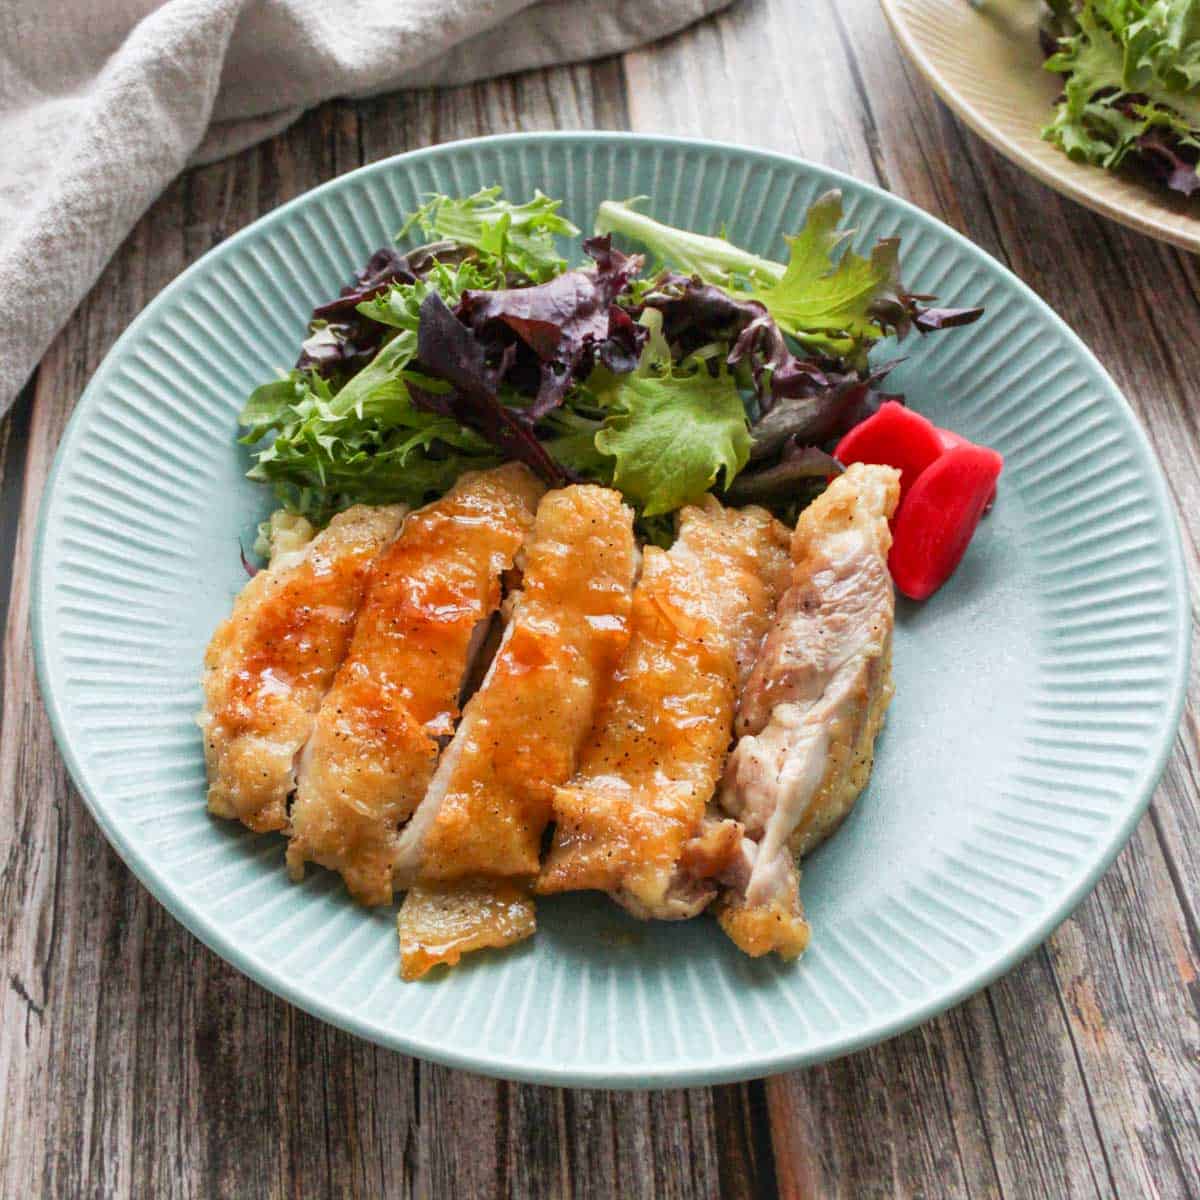
I usually serve teriyaki chicken with veggies like shredded cabbage or a simple green mix, but it goes great with anything—stir-fried broccoli, carrots, or even just a bowl of rice!
Here’s a sample meal using the Ichiju-Sansai format:
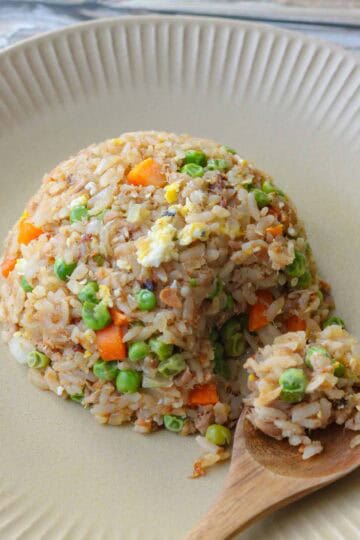
- Rice: Japanese short-grain rice
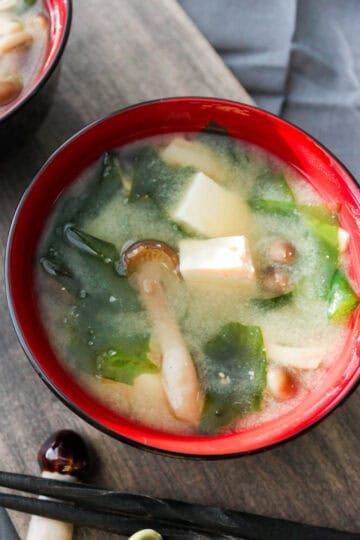
- Soup: Basic miso soup
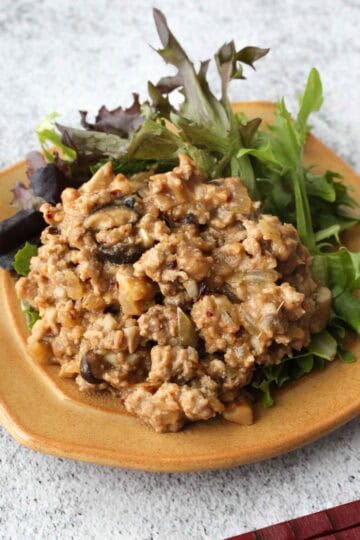
- Side 1: Japanese potato salad
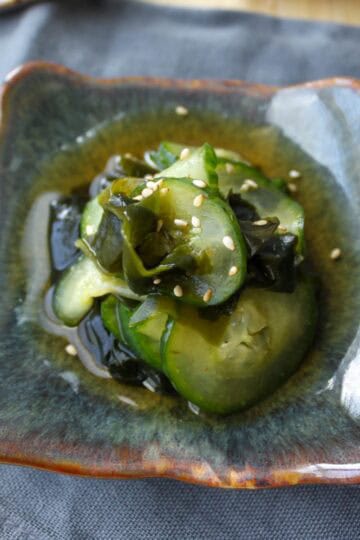
- Side 2: Sunomono (Japanese cucumber salad)
A balanced and delicious meal!

Storage & Reheating Instructions
- To store: Let the chicken cool, then pop it into an airtight container and keep it in the fridge for up to 3 days. For longer storage, wrap each piece in plastic wrap, place them in a freezer bag, and freeze for up to 3 weeks. Either way, make sure to store the chicken whole (don’t cut it into bite-sized pieces yet) and only after it’s completely cooled.
- To reheat: When you’re ready to eat, just microwave and enjoy!
FAQs
Teriyaki chicken is a super popular dish in Japan. "Teri" means "shiny," referring to the glossy finish you get from mirin and/or sugar, and "yaki" means "pan-fried." So, "teriyaki chicken" is essentially pan-fried, shiny chicken.
While there are lots of teriyaki chicken recipes out there, most are twists on the traditional version. (If you're looking for something like Panda Express, this recipe probably isn’t for you!) Traditional teriyaki chicken is way simpler—and it’s super easy to make!
Yes! Making the sauce ahead of time is a great way to save time during the week. Just mix all the ingredients in a clean jar and keep it in the fridge for up to two weeks.
Hibachi chicken is usually served with yum yum sauce, which is made with ketchup, mayo, and other ingredients, so it’s pretty different! Honestly, I didn’t even know what “hibachi chicken” was until recently—it's actually a Japanese-inspired dish that started in the U.S. 😂
They’re almost the same, and you can swap one for the other. The main difference is that yakitori sauce is usually thicker because it’s brushed over skewered chicken.
Authentic Japanese teriyaki chicken doesn’t require marinating. But if you're grilling the chicken, it’s better to marinate it beforehand.
More Japanese Main Dish Recipes
Looking for other recipes like this? Try these:

💌 If you tried this recipe and liked it, I’d love to hear from you! Leave a comment and review below, or send a photo of your dish to my email. I’d be so happy to see your creation!
📖Recipe
Authentic Japanese Teriyaki Chicken
Ingredients
Method
- Prep the chicken: Pat dry 2 boneless, skin-on chicken thighs with a paper towel. Remove bones and extra skin with a knife if needed. Make shallow cuts across the grain on the side without skin—deeper cuts on thicker parts, at 0.8 inch / 2 cm intervals, but don’t cut all the way through. If you’re using skinless chicken, make cuts on the uneven side.
- Season the chicken: Throw the chicken, 2 tablespoons cornstarch, ⅛ teaspoons kosher salt, and ⅛ teaspoon ground black pepper in a plastic bag. Shake until it’s all coated, then remove the chicken and shake off the excess.
- Make the sauce: In a small bowl, whisk together ¼ cup mirin, ¼ cup sake, and 2 teaspoons soy sauce.
- Heat your pan over medium. If you're using skinless chicken, add some oil. Once hot, add the chicken, skin-side down (or flat side down if skinless).
- Press the chicken with a spatula for about 10 seconds, then fry for 8 to 10 minutes until crispy.
- Flip the chicken, press down again for about 10 seconds, and cover. Let it steam on low heat for 1 to 2 minutes.
- Take the lid off and use a paper towel to wipe away any excess oil. Turn the heat to medium and pour in the sauce. Once it starts to bubble, begin spooning it over the chicken. Let it simmer until the sauce thickens and turns glossy—it should be thick enough to cling to the chicken. Keep spooning the sauce over the top and gently move the pieces around so the bottoms get coated during the process.
- Serve: Take the chicken out, slice it into bite-sized pieces, and enjoy!
Notes
- (Note 1) The type of Chicken: For the juiciest, crispiest teriyaki chicken, go for boneless, skin-on thighs. They're hard to find in the U.S., so I usually debone skin-on thighs myself. Skinless thighs work too, just less crispy. Breasts are an option but can be drier. If using skinless chicken, add a little oil for extra crisp!
- (Note 1-2) The Size of the Chicken: I tested this recipe with thighs around 7 ounces / 200g each. If yours are bigger or smaller, just tweak the cooking time!
- (Note 2) Grilled vs. Baked vs. Pan-Fried: In Japan, teriyaki chicken is pan-fried (just like the name says!), but you can grill or bake it for a more American-style twist. Just marinate it first to lock in the flavor!
- To store: Let the chicken cool, then pop it into an airtight container and keep it in the fridge for up to 3 days. For longer storage, wrap each piece in plastic wrap, place them in a freezer bag, and freeze for up to 3 weeks. Either way, make sure to store the chicken whole (don’t cut it into bite-sized pieces yet) and only after it’s completely cooled.
- To reheat: When you’re ready to eat, just microwave and enjoy!
📌Pin This Recipe For Later!


Kurumi says
The week I spent testing this recipe felt like heaven! I made so many versions of teriyaki—this one turned out to be the best, but honestly, even the earlier ones were delicious. I was more than happy to eat the leftovers all week long 🙂 The chicken is super juicy on the inside, the skin gets nice and crispy, and that sweet and savory teriyaki flavor pairs perfectly with rice. I hope you love this recipe as much as I do!